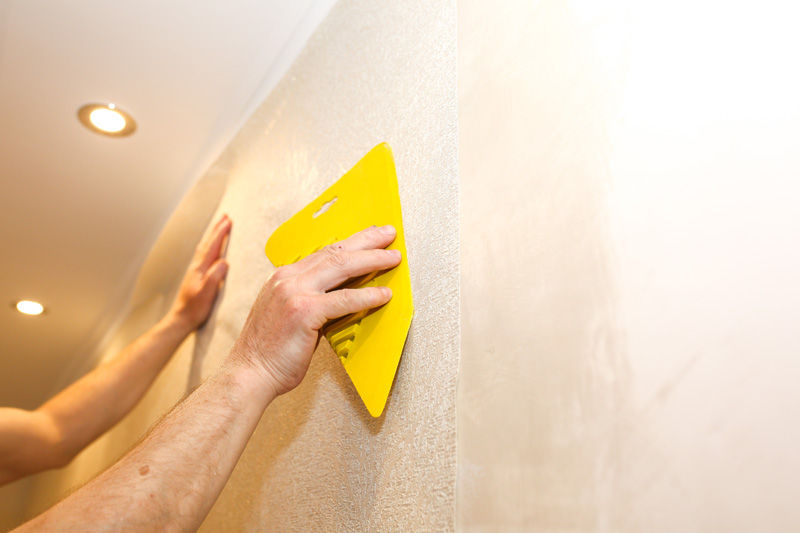
How to Hang Wallpaper
- Matt Weber

- Dec 12, 2023
- 3 min read

Installing wallpaper is an easy process and a versatile way to add artistic décor to an interior
living space.
Before installing, allow the wallpaper to acclimate to your room temperature to avoid shrinkage.
The wall should be clean, dry, and free of any bumps or holes. Use sandpaper to make the wall surface smooth and fill any holes or dents with spackling paste. Allow the wall to dry completely before proceeding.
Step 1

Measure the height and width of your wall in feet to help you determine how much wallpaper you need to purchase. Add an extra foot to your measurements to allow for any
errors or pattern matching. Areas where there is an obstacle (window, door, etc.) will be cut away during installation.
Step 2

Mark the height of the wall on the wallpaper, then cut the wallpaper into strips that are several inches longer than the height of your wall. Make sure to line up the pattern on each strip so that it matches up seamlessly.
Step 3

Mix the paste according to its instructions. A drill and paddle can make quick work of this task.
Step 4

Brush the paste onto the wall, covering the entire surface with a thin coating.
Step 5

To improve accuracy, you can measure the strip width, then mark it on the wall lightly with a pencil. Use a spirit level to draw a vertical line from the ceiling to the floor by keeping the mark as a guide.
Step 6

Apply the first strip of wallpaper to the top of the wall, aligning the edge of the paper with the ceiling or crown molding.
Step 7

Smooth the wallpaper strip from the center outwards to remove any air bubbles using a soft, dry cloth or smoothing tool. When hanging other strips, make sure to avoid overlapping them. Match the images or patterns and paste the wallpaper edge to edge.
Step 8

If you press the strips firmly with a roller or smoothing tool, the seams should not be visible. While wallpapering, be careful with the paste, and if it gets on your wallpaper’s surface, wipe it with a clean dry cloth. Do not use a wet or damp cloth for this, otherwise it could rub off the ink.
Step 9

Cut and apply the remaining wallpaper strips, aligning the pattern as you go along. Repeat until you have covered the entire wall. Trim the excess wallpaper along the edges of the wall using a sharp knife or wallpaper scissors.
Finally, clean any excess glue from the wallpaper with a damp sponge. In areas exposed to water splashes, we recommend coating it with a matte decorator's varnish to ensure the water-resistance of the paper.
Make sure the room has good ventilation then allow the wallpaper to dry at room temperature for at least a day before restricting the airflow in the room.
Side Note 1
Quick Tip for Peel & Stick

To install peel-and-stick wallpaper, follow the same instructions detailed in this article, but instead of pasting the wall, you simply peel off the release liner and apply the wallpaper to the wall. If you see any air bubbles during installation, avoid rubbing them out with a smoothing tool, because they’ll only return. Instead, peel up the wallpaper and reinstall it until it’s applied with no air bubbles present. This can require some patience but will result in a better finish.
Image © York Wallcoverings
Side Note 2
Installing Murals

When hanging a wallpaper mural, each panel will arrive as a roll. Unroll all panels and identify the order that they need to be hung from left to right. Note that the mural has typically been printed slightly larger than your wall dimensions to create excess. When installing the first panel, make sure to use the vertical excess at the tops and bottom, which will help with uneven walls. Paste the wall and begin hanging your wall-paper from the top downward. Smooth away all the ripples or bubbles using a soft, dry cloth or smoothing tool. When hanging the following strips, make sure to avoid overlapping them. Match the images or patterns, then paste the wallpaper edge to edge.


AV在线看 AV在线看;
自拍流出 自拍流出;
国产视频 国产视频;
日本无码 日本无码;
动漫肉番 动漫肉番;
吃瓜专区 吃瓜专区;
SM调教 SM调教;
ASMR ASMR;
国产探花 国产探花;
强奸乱伦 强奸乱伦;