
4 DIY Tips for Cutting Corners in Trim
- Matt Weber

- Jun 29, 2021
- 3 min read
Updated: Jul 12, 2021

Use the Right Blade
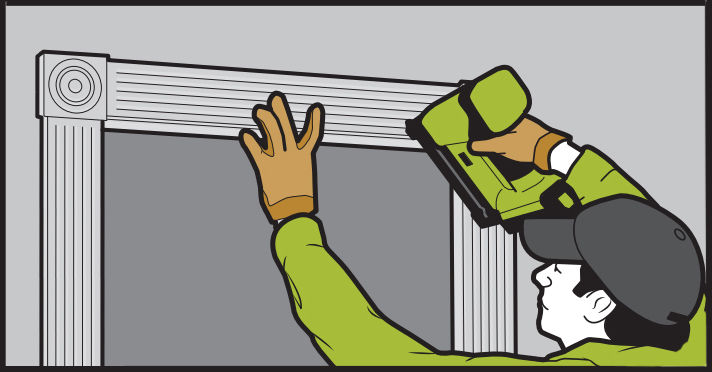
The most versatile tool for cutting the linear strips of molding will be a powered miter saw with a quality blade.
The quantity of teeth plays a significant role in the blade’s performance. Blades best suited for rough work (such as ripping 2x stock lengthwise along the grain) have fewer teeth with large gullets for easy chip removal. Blades meant for crosscutting boards into shorter lengths have more teeth with a smaller gullet for a smoother cut.
When cutting trim, an even higher number of teeth translates into smoother cuts for finish applications. The type of material is also a factor; for cutting PVC product HIR recommends using a carbide toothed blade with 80 teeth or more to prevent chipping. A blade designed specifically for trim-work can increase your cutting accuracy, which helps when mating the joints. A rough cut might require you to sand the cut smooth, but the act of sanding can alter the shape of the cut, so it may no longer fit perfectly during assembly. Spare yourself the frustration on trim projects and use fine-toothed blade intended for trim.
Calibrate your Miter Saw
A miter saw’s reliability to cut an accurate angle should also be checked and maintained, because a little misalignment can cause major headaches for a carpentry project. Calibrating the saw is an important step because a difference as small as 1° over a 1-in. span will result in a 1/32-in. gap in the finished miter joint. Similarly, 3° over 5-in. span gives you a 3/8-in. gap. The misaligned pieces won’t join together tightly if the cuts have been made at an incorrect angle.
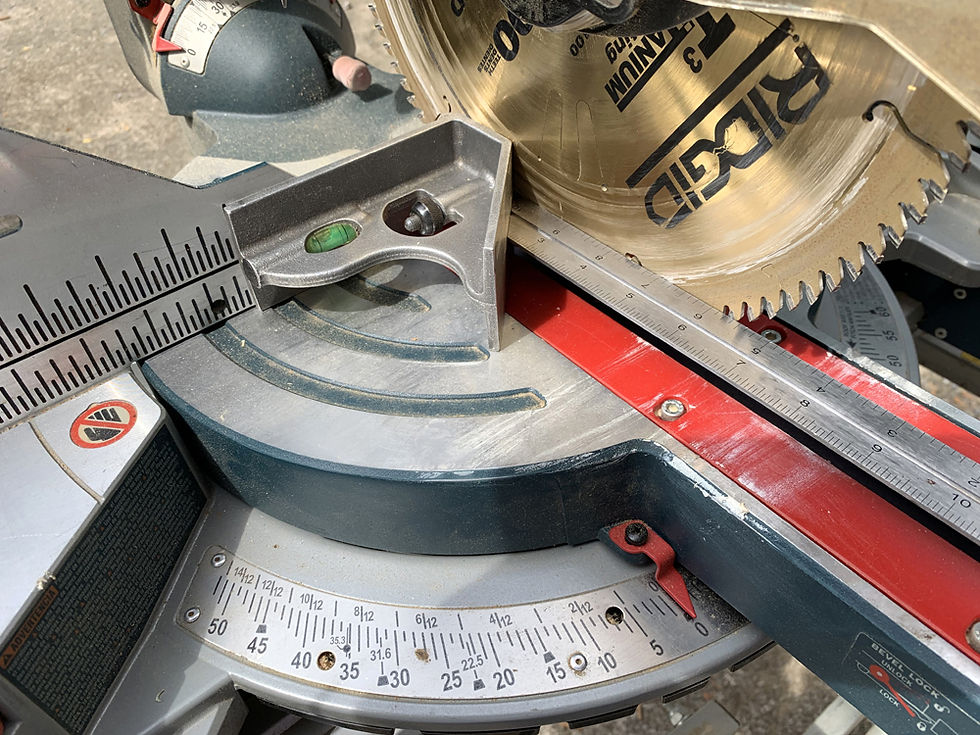
Miter Angle—A combination square makes a handy tool for confirming the saw blade’s miter alignment, ensuring the blade is set exactly at 90 degrees to the saw’s fence (which should register as 0 degrees on the saw blade’s angle indicator). There should be no gap between the edges of the square and the blade or fence.
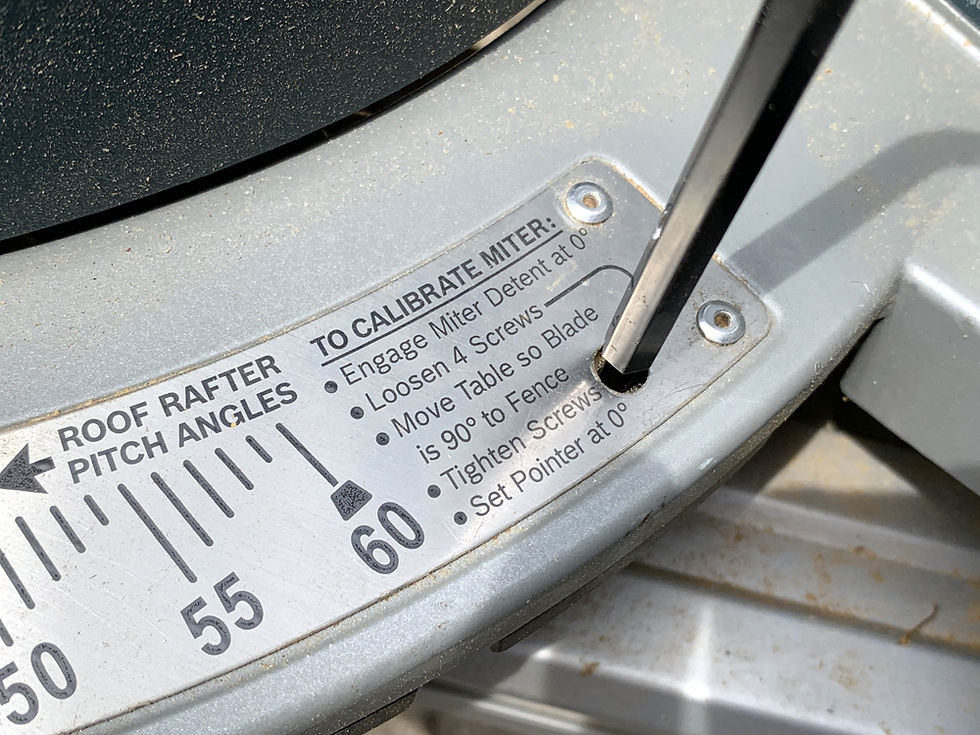
If there is a gap, you’ll need to refer to your saw’s operation manual for specific steps on how to adjust the blade angle. To adjust alignment on the Bosch compound miter saw shown in the photos, I had to loosen four set screws with a hex key, move the table so the blade was a perfect 90 degrees to the fence, then retighten the screws. Once the blade aligned with the combo-square calibration check, I knew I could rely on my saw to cut accurate miter angles.
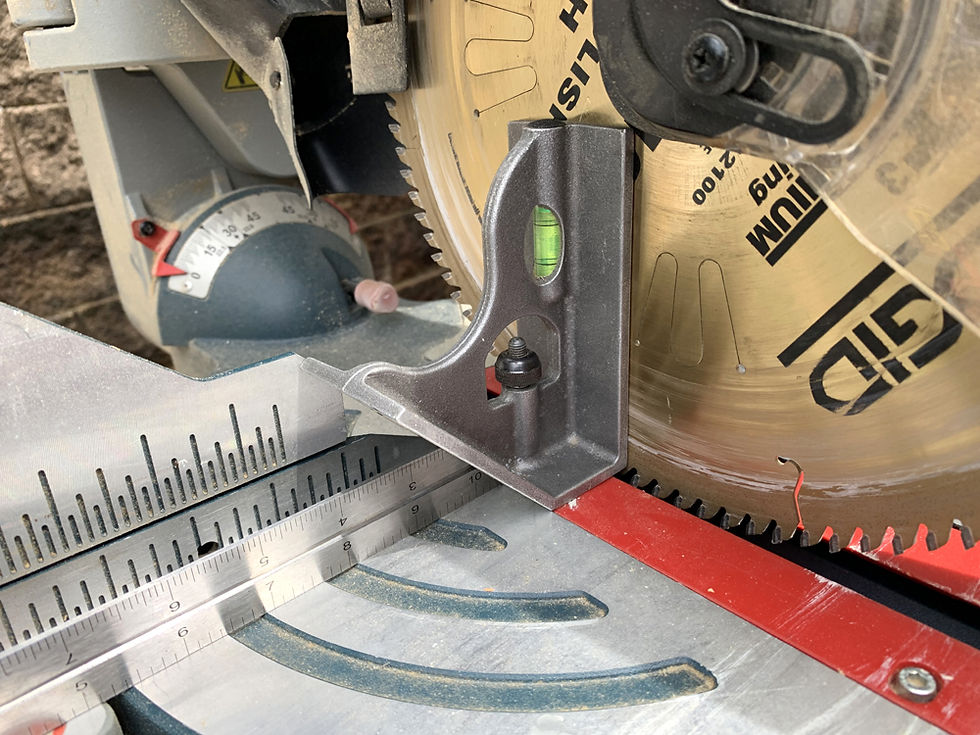
Bevel Angle—Compound miter saws offer a bevel adjustment feature which should also be calibrated. You can verify the vertical tilt of the blade by aligning the combo-square with the saw base and the blade. Check for any gaps between the square and the blade.
If the bevel requires adjustment, follow the steps in the owner’s manual, which usually requires loosening some set screws or bolts at the bevel post of the saw’s cutting head.
Measure Your Miter Joints
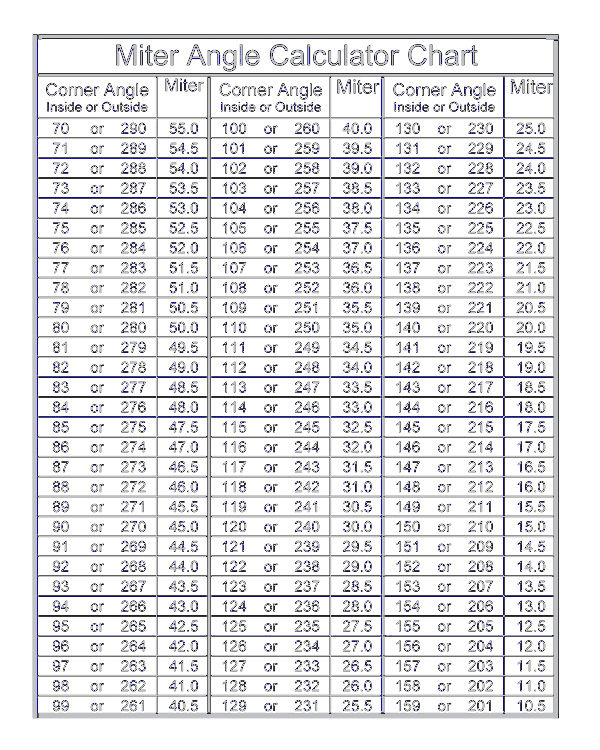
Once your saw is set up to cut an accurate angle, trim installers quickly learn that not all corners of the house are truly square. It’s not uncommon for the wall angles of a house to be off as much as 3°, which can result in a gap in the miter joint if the pieces are each cut at 45 degrees.
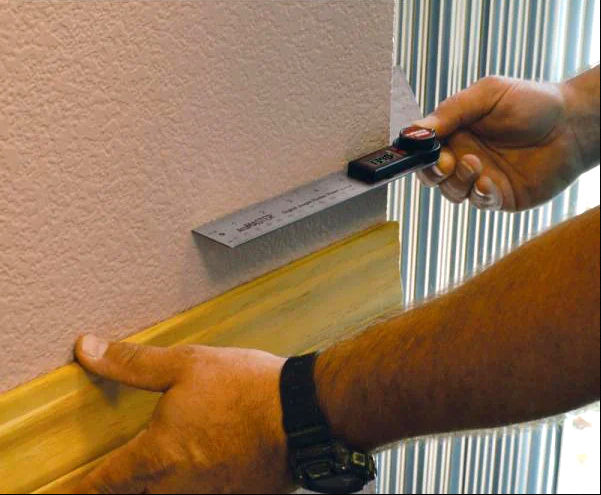
To solve this problem when cutting Vertical Position Miters (baseboard, chair rail, quarter round, etc.) for outside corners, you should measure the angle then refer to an Angle Calculator to determine the two complementary angles needed to close the joint. (See chart below). For example, an outside corner that measures 272 degrees will need two 46-deg. miters for a perfect joint.
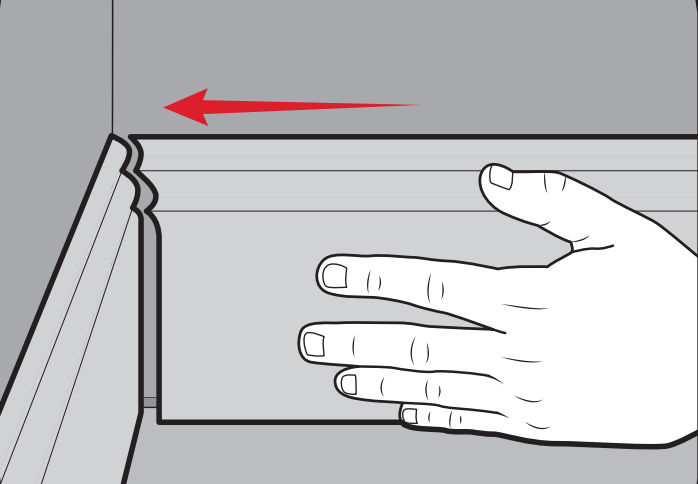
It's tough to avoid miters on outside corners, but for inside corners, you have the option to make a cope joint. Read more about how to cope molding HERE.
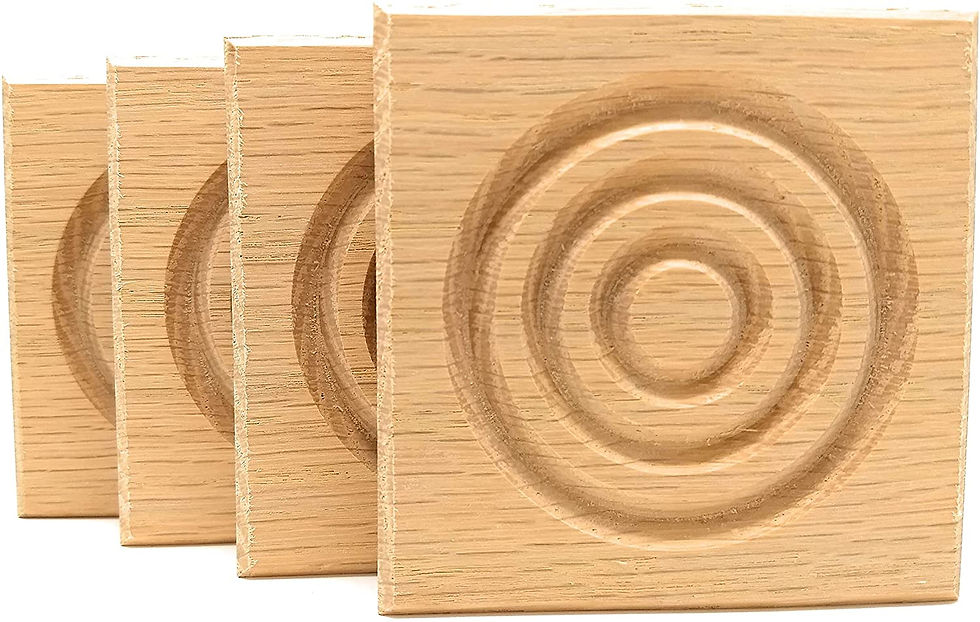
How to Skip Miters on Casing
If assembling mitered corners absolutely gives you the fits, consider simplifying window and door casing by incorporating pre-made rosette blocks at the corners. Rosette blocks assemble with simple butt joints against square cross-cuts, so there’s no need to measure, cut, and join miter angles. The blocks are carved from solid wood or MDF, usually 3/4-in. thick, and the standard 3-1/2-in. block works well with 1x4 trim or 3-1/4-in. moldings. Install them with glue, finish with a little caulk and paint, and the blocks can add a decorative touch to the corners.


Comments