
Building Ground-level Decks
- Matt Weber
- Apr 17, 2023
- 4 min read

Decks that Make the Grade!
Grade-level decks present an attractive alternative to hardscaping and are often less expensive to build than elevated decks.
“The most popular choice of deck among our customers is a floating deck, which is low to the ground and requires no railing,” says Kerry Murray, owner of Mjolnir Construction of Stittsville, Ontario.
In the U.S., decks built lower than 30 inches from the ground don’t require guardrails. (The rule is 24 inches in Ontario, so check local codes). If a grade-level deck is built as a freestanding structure, it won’t require a ledger connection to the house or the associated hardware, nor will it require excavation for frost-depth footings. In many cases, a ground-level deck won’t even require a building permit.

Grade-level floating platforms can be incorporated into multi-level decks, as shown on this project from Mjolnir Construction.
Footings
Because freestanding or “floating” decks do not require frost-depth footings, the posts and beams can be supported by shallow footings. This is due to the low safety risk of frost heaving on a ground-level deck. You should always check with your local code-enforcement department for specific guidance, however, which might require you to dig a minimum footing depth of 12 inches below the ground.
For grade-level freestanding decks, you can skip the time and labor associated with
mixing concrete by using precast concrete piers or stacked and glued concrete blocks
as footings.

Pre-cast concrete piers are available at most hardware stores and landscape supply centers.
In the U.S., decks built lower than 30 inches from the ground don’t require guardrails.

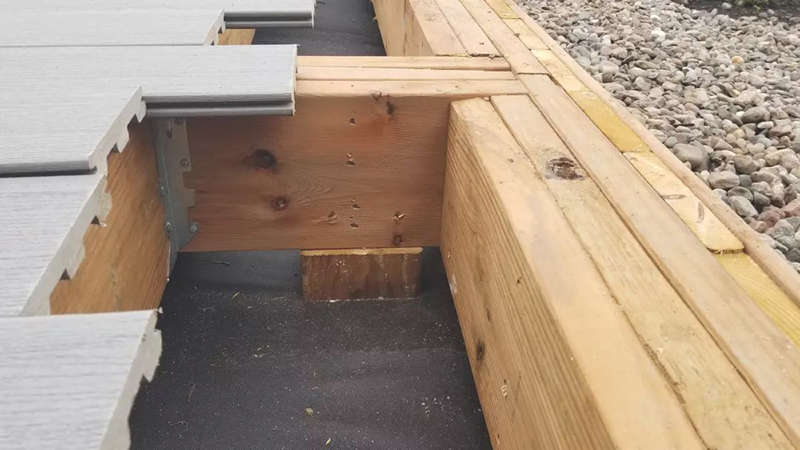
Composite decking can provide a sleek uniform deck surface in a wide range of low-maintenance colors and textures. Notice the bed of river rock to facilitate drainage beneath the framing.
Joists & Beams
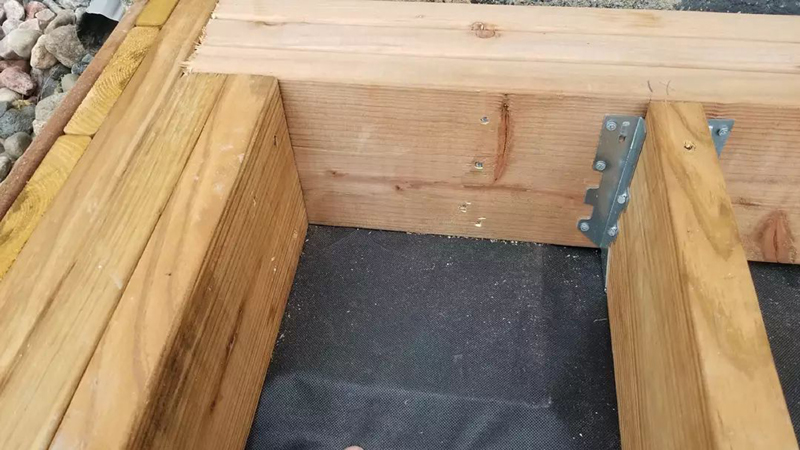
A slope in the grade might allow clearance for a cantilever beam on one side of the deck, but if there’s no room for a beam, then the rim joist will serve as the beam, and the joists will connect to the rim with metal hangers. Corner brackets can help maintain squareness of the deck frame during construction. Double or triple the thickness of the rim to add strength and rigidity to the framing.
You should frame the deck with Ground Contact Lumber. Ground contact means that
the pressure-treated lumber is approved for applications that require the component to
be either placed on or directly in the ground (such as deck or fence posts). Even if the
lumber doesn’t actually touch the ground, this type of lumber should be used because
it has extra preservative to better withstand near-to-the-ground conditions where moisture can be more prevalent because ventilation is limited.
Due to the limited ventilation below the deck, another option would be to upgrade the metal hangers and hardware to stainless steel which will prevent corrosion.

In many cases, lack of clearance beneath the deck surface means the rim joist will serve as the beam with the joist connected to it with metal hangers. Fortifying the rim joist by doubling or tripling its thickness will add strength and rigidity to the deck frame.
Moisture Control
Since moisture can be an issue for grade-level decks, you should begin by sloping the earth away from the house foundation to ensure there is positive drainage.
One way to prepare the site for moisture control is to dig out the earth of the deck
site, line it with a layer of landscape fabric to prevent weed growth, then backfill with 3/4-in. clear limestone that will shed water away from the framing to facilitate drainage.
Check your decking manufacturer’s recommendations regarding any further requirements for air circulation to prevent any performance problems. Products and guidelines will vary.

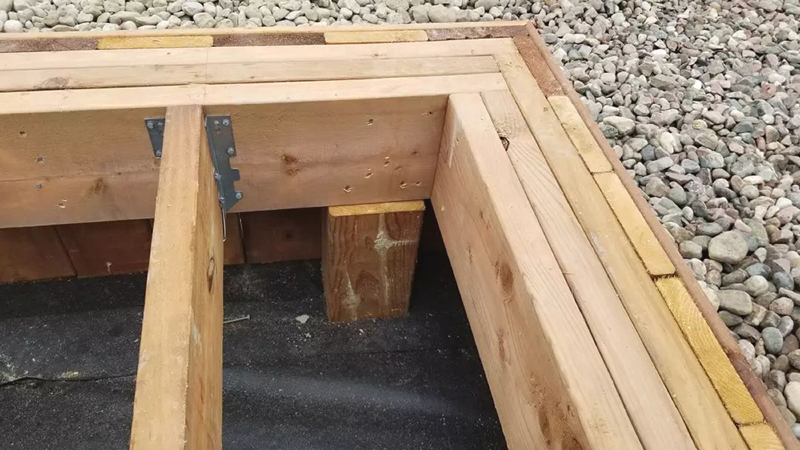
Landscape fabric beneath the deck frame will prevent weed growth.

To facilitate drainage, Kerry Murray suggests adding 3/4” clear limestone beneath the
deck over the landscape fabric.

On the deck shown, Mjolnir Construction prevented 100 pieces of lumber from going into the landfill. The customer wanted the deck framed with new pressure-treated material, but for the deck boards and skirting they wanted to use reclaimed 2x6 lumber that had been given to them from a construction site. Mjolnir designed the frame to accommodate the lengths of 2x6 to avoid unnecessary joints in the deck boards, then a good pressure-wash brought out the unique appearance of the wood. After a waterproofing stain is applied, this deck will stand the test of time and demonstrate the company’s commitment to being an environmentally conscious small business.
SIDE NOTE
Building a Strong Foundation
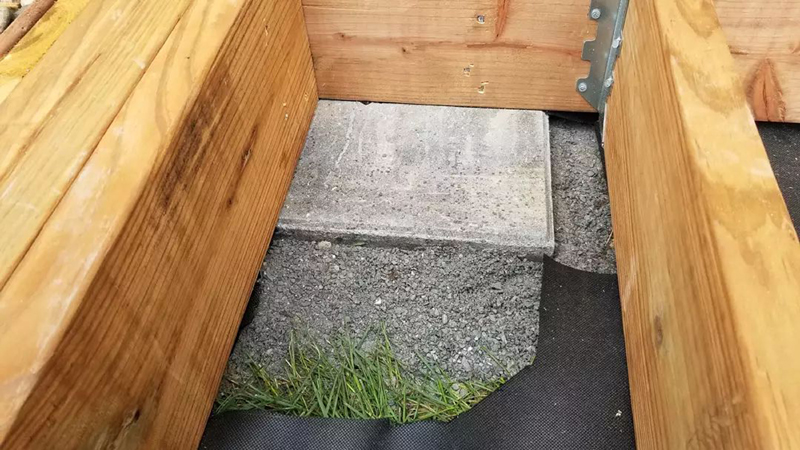
We were asked how we prepare the base for our floating decks, and here is how,” explains Kerry Murray of Mjolnir Construction. “At the wall of the house, which is the highest point in the yard, we remove the grass and 4 inches of dirt. Then we fill this pocket with limestone and tamp it down to pack it. We lay down a 16"x16"x2" paver stone, which ends up being flush with the finished grade, giving us our base.
"The beam of our deck then sits directly on top of the paver stone to keep the deck as low as possible to the ground. As the grade drops further away from the house, we simply add a 6x6 post to make up the change in grade.”


Editor’s note: Special Thanks to Kerry Murray and Mjolnir Construction for
contributing photos and information to this article. You can find Mjolnir Construction online at https://mjolnirconstruction.ca and follow their Instagram page @mjolnirconstruction.