Fix a Leaky Toilet at the Base Like a Pro
- Matt Weber

- Aug 5, 2025
- 8 min read

By Sean Comerford
Toilets may seem like simple fixtures, but leaks can be a common and frustrating problem, potentially damaging your bathroom. Understanding the various causes of leaks is essential for effective repair.
In this guide, we’ll break down the troubleshooting process, empowering you with the knowledge and tools to tackle the issue like a pro, saving time and money.
If a toilet leaks from the base, the most common cause is a damaged closet flange. However, before removing the toilet to inspect the closet flange, check for these potential issues and repair as necessary:
Loose floor bolts: Tighten them gently with a wrench to secure the toilet base without cracking the porcelain. Replace the washers or bolts if damaged.
Cracks in the toilet bowl or tank: Turn off the water supply and drain the toilet. Then, for hairline cracks, use a waterproof epoxy or porcelain repair kit. If the crack is large, replace the bowl or tank entirely to prevent leaks and further damage.
Clogged drain line: To clear a blockage, first try using a plunger or a toilet auger. If those methods don't work, consider using an enzymatic drain cleaner. For more severe clogs, it's best to call a professional plumber. If there is a backup that leaks from the base of the toilet, the closet flange or wax ring needs to be checked, as the seal may be compromised.
Leaks in the water supply line: Turn off the water supply, tighten or replace the compression nuts or washers, and use plumber’s tape on threaded joints to ensure a watertight seal. Another option is to replace the supply line entirely.
Condensation: Reduce humidity by improving bathroom ventilation, insulating the toilet tank with a liner kit, or installing an anti-sweat valve to mix warm water with the cold supply to prevent moisture buildup.
If the leak continues, inspect and repair (or replace) the closet flange as needed by following the steps below.
Closet Flanges And Wax Rings
A closet flange, also called a toilet flange, serves as the point of connection between the toilet and a home’s sewage drainage system and secures the toilet to the floor.
A wax ring mounted on the closet flange creates a watertight seal between the bottom
of the toilet and the sewer pipe, preventing leaks, odors, or sewer gases from escaping
the fixture.
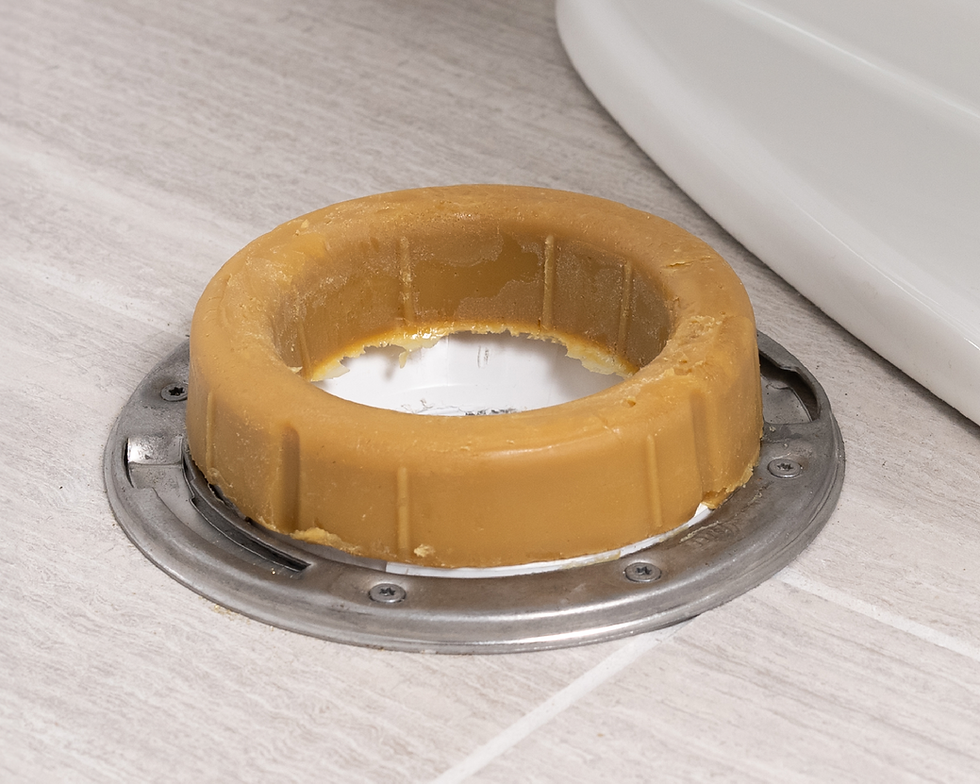
The wax ring creates a water-tight seal.
Closet flanges and wax rings work together. If the closet flange cracks and causes the toilet to become unstable, the rocking movement can also break the wax seal. When this occurs, water will leak from the toilet base and often through the ceiling below.
Improper installation practices are typically the reason for this type of failure.
Tools and Materials Needed:
Adjustable wrenches
Bucket/sponge
Mini hacksaw
Replacement wax ring
Replacement toilet mounting bolts
Replacement water supply line
Floor covering
Oatey Fix-It Repair Ring or
Oatey Set-Rite Flange Extender
Turn Off the Water Connection
Before replacing your toilet, ensure the water supply is shut off. Typically, the valve is located behind the toilet. Turn it clockwise to shut off the water supply.
If no valve is present behind the toilet, shut off the home or building’s main water supply. This valve is usually located in the basement or laundry room.
Once the water supply is off, lift the toilet tank lid and flush the toilet. Keep the handle down to empty as much water as possible from the tank and bowl. Use a sponge to remove any remaining water from the bowl, or use Oatey LiquiLock to temporarily solidify the remaining water in the bowl.
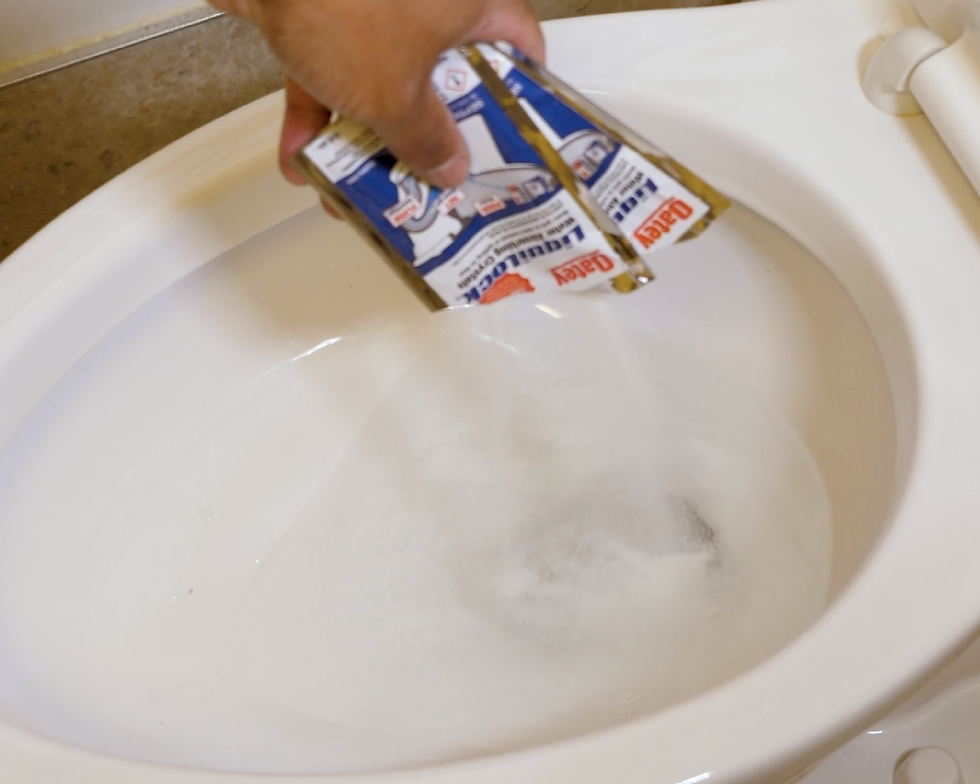
Liquilock is a product that solidifies water in 4-5 minutes to help prevent drips and leaks when removing toilet fixtures. The gel dissolves when additional water is added.
Disconnect the Supply Line
To disconnect the water supply line from the toilet fill valve, loosen the 3/8-inch compression nut. This will help when resetting the toilet after the wax seal is replaced.
Cover the bathroom floor or bathtub with a protective material depending on where you plan to place the toilet while replacing the wax seal.
Next, remove the caps covering the bolts and washers by gently prying them upwards with a flathead screwdriver. Be cautious not to exert too much pressure on the china to avoid chipping or cracking.
Use an adjustable wrench to remove the nuts and washers from the bolts at the toilet base. If the bolt spins while turning the nut, hold it with a separate pair of pliers. If you are not using new bolts, nuts, and washers, store the existing ones to avoid losing them.
Tip: We recommend replacing the toilet supply line when replacing the toilet wax ring.
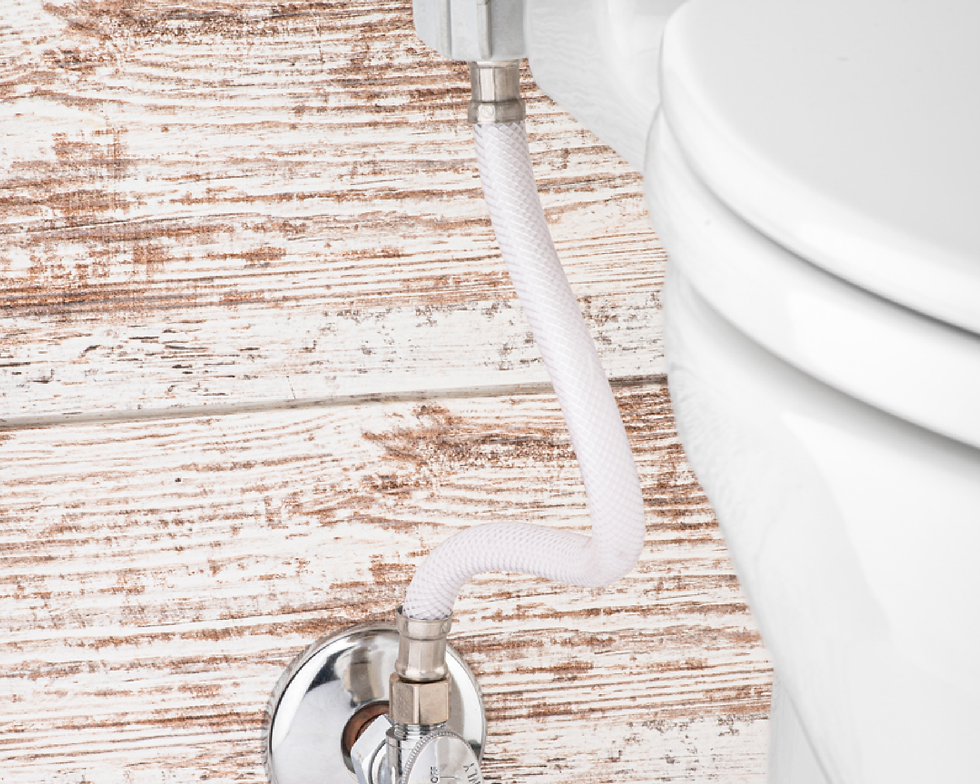
If the wax ring is old to enough to require replacement, then it’s probably time to replace your supply line as well.
Remove the Toilet
To remove the toilet, grab it under the sides of the bowl and rock it gently back and forth
to break the old wax seal. Lift the toilet off the floor and set it on the protective covering. If the toilet is caulked to the finished floor, score the caulking around the toilet base with a razor knife.
Remove the Old Wax Ring
While wearing gloves, remove the old toilet wax ring. Using a putty knife, scrape the old
wax seal off the toilet’s base and toilet flange. Next, scrape the caulk off the toilet bowl and the finished floor. Before installing a new toilet wax ring, inspect the toilet flange for any cracks or decay.

Use a scraper to remove all the wax ring material and scrape the caulk off the toilet bowl and the finished floor.
After removing the old toilet wax ring, immediately plug the drain to prevent noxious sewer gas from entering the home or building. We recommend using a 3- to 4-inch gripper plug when the toilet will be displaced for an extended time. If you plan to reinstall your toilet immediately, stuffing a large ball of rags into the pipe will suffice.
Repair or Replace the Closet Flange
With the toilet and wax ring out of the way, you should now be able to diagnose the issue behind any leak of your toilet base.
• If the toilet flange is cracked or missing one or both slots that the toilet bolts slide into, apply an Oatey Fix-It Repair Ring to save your-self the time and hassle of replacing the entire closet flange and ring unit. The Fix-It Repair Ring can be placed on top of a broken flange and includes 10 mounting holes for a wide range of installation options.
• If the flange is below the finished floor level, install Oatey’s Set-Rite Flange Extender
Kit to raise the flange to the correct height.
Applying the Fix-It Repair Ring
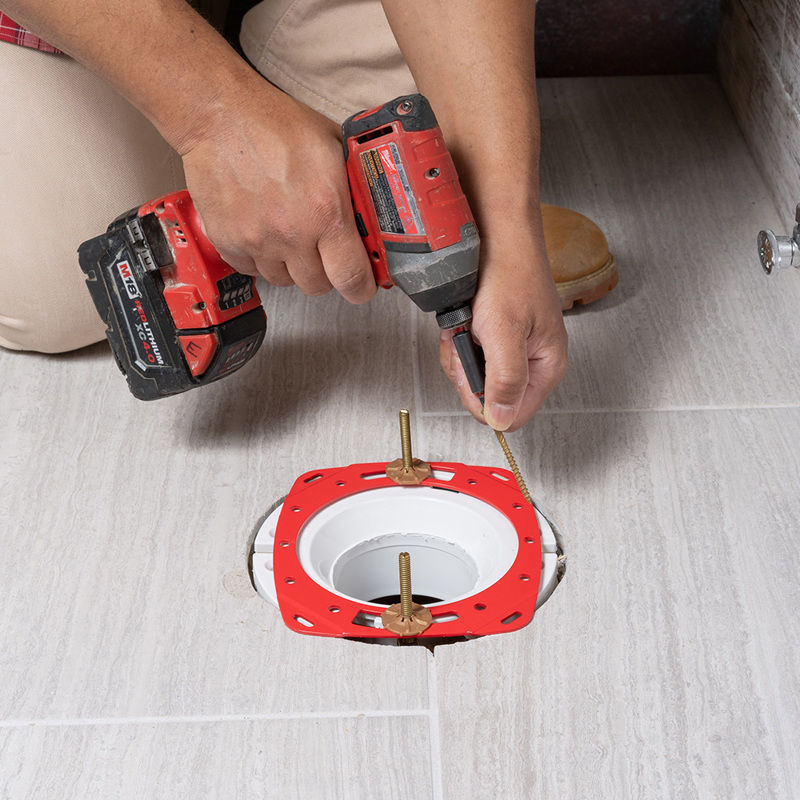
The Fix-It Repair Ring can be placed on top of a broken flange and includes multiple mounting holes for a range of installation options.
To start, line the rim with silicone sealant. Slide Johni-Bolts into intact slots and press the replacement ring to the sealant. Screw the repair ring to the subfloor using the hole at each of the four corners before wiping away excess sealant. Finally, slide the bolts into the slots on the repair ring.
Raising the Closet Flange
If the flange is below the finished floor level, install Oatey’s Set-Rite Flange Extender Kit to raise it to the correct height. The Set-Rite spacers come in sizes ranging from 1/8 to 3/4 inches and can reach a height of 2-1/4 inches. (The flange itself adds 5/8 inch.) Tip: The maximum offset from the flange to the top of the floor is 1-5/8 inches.
The spacers of Oatey’s Set-Rite Flange Extender Kit can be stacked on each other
to maximize height.
First, measure the height from the existing toilet flange to the finished floor. Purchase an extension kit according to this measurement, as spacers can be stacked on each other to maximize height. When installing an extension kit, insert the foam rubber gasket before arranging the spacers and flange on top. Finally, screw the flange into the subfloor.
Don’t see any visible damage to the toilet flange, ring or inner pipe? If a leak persists onto lower floors or seems to be seeping into the subflooring, we suggest hiring a professional to diagnose any issues with the internal piping beneath the floor.
Replace the Toilet Wax Ring
Anytime a wax seal is replaced, you should replace the T-bolts that attach the toilet to the flange. Some wax rings come in a kit that includes new mounting bolts.
Consider using Hercules Johni-bolt, a brass bolt with a snap-off slot and captive washer, available in regular and extra-long lengths. If you are keeping the existing bolts, ensure they are in good condition and properly aligned with the flange and wall. Install any needed repair parts or spacers before adding the new mounting bolts.
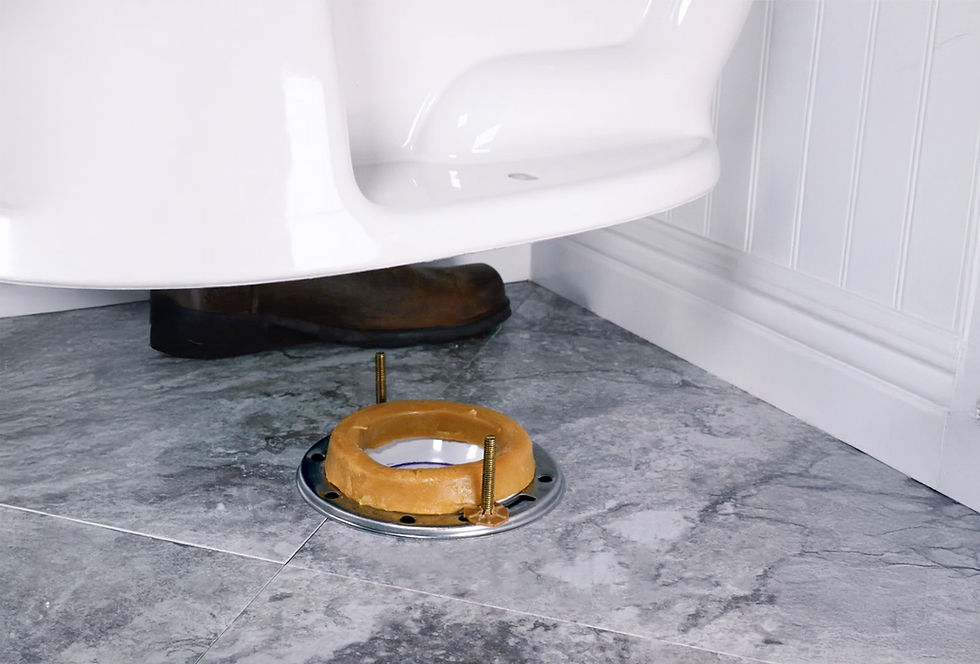
Now that the mounting bolts are secured, it’s time to replace the toilet wax ring. Position the new toilet wax ring on top of the toilet flange, ensuring it is centered. You must replace the wax ring whenever you remove a toilet. But always check if the closet flange needs to be repaired or replaced, too.
When replacing a wax ring, you always want to start fresh, so you must completely scrape
off the old ring with a putty knife. From there, the installation is pretty simple. Place the wax ring on the flange and then drop the toilet into place.

When reinstalling the toilet, it’s important to compress the wax ring to make the toilet sit flush on the floor before bolting it in. The best way to do this is to use a slight, side-to-side twist motion until the bowl is completely leveled. Then tighten the toilet bolts and hook up the water supply.
Keep the wax itself between 70-110 degrees F. If you need to warm up your wax ring in a pinch, fill the sink with warm water and let it sit for a few minutes to bring it to the right temperature for installation.
Re-Install the Toilet
When reinstalling the toilet, use the bolts as guides. Keep the tank parallel to the wall to ensure a level placement on the new wax ring.
Do not rock the toilet as you place it onto the new toilet wax ring. Instead, use a slight side-to-side twisting motion until the toilet bowl rests on the finished bathroom floor.
Many people tend to rock a toilet back and forth during installation. What happens to the wax gasket because of this? Because wax material has no memory, it won't be compressed evenly if this rocking movement occurs. A lack of even wax compression will likely result in several leak paths. This is why we recommend slightly twisting side-to-side when placing a new toilet on the wax seal.
Tip: If the toilet bowl will not level, use toilet shims.
Secure the Toilet
Reinstall the washers and bolts in their original order and location. Tighten the bolts while alternating from side to side until the toilet bowl is securely and evenly set on the finished floor. Avoid overtightening the bolts, which can lead to damaging or cracking the toilet bowl. If necessary, saw off any excess bolt length, then add the decorative caps.
Tip: Stop tightening the nuts as soon as they’re snugly in place to prevent the toilet from tipping. Too much torque can crack the porcelain or damage the drain flange.

Test for Leaks
Finally, rehook your water supply. After reinstallation, turn on the water and let the tank fill before flushing. If you used LiquiLock to solidify the water, follow the instructions on the package when reintroducing new water into the toilet bowl.
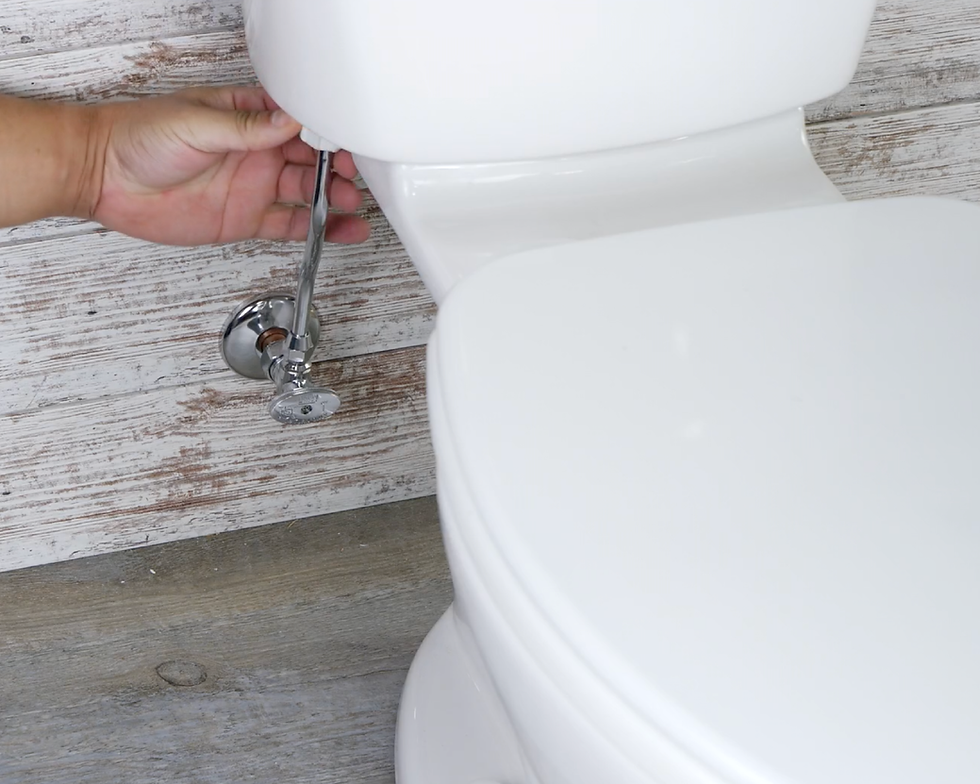
Reconnect your water supply and test for leaks.
Position tissues or toilet paper around the entire base of the toilet bowl where it meets the finished floor. Then, flush the toilet multiple times. If you detect water on the tissues or paper, the wax seal isn't correctly installed, and you will have to remove the toilet and start the installation over with a new wax seal.
If you do not see any leaks, caulk the toilet bowl to the finished flooring. If a leak is detected, identify the source as soon as possible before floor damage can occur. For insurance against leaks, replace the water line linking your toilet to the water line coming through the wall or floor.

---
About the author: Sean Comerford is Manager, Inside Sales and Tech Support at Oatey Co. He is a third-generation tradesman with nearly 20 years of plumbing experience, including serving as the lead plumber for commercial/residential new-construction, service and fire protection jobs. He holds a State of Ohio Fire Protection License for Sprinkler and Standpipe.


Comments