Search Results
Search this site
462 results found with an empty search
- 6 Tips for DIY Lawn Care
Compiled by Christopher West The HRN216VKA self-propelled mower from Honda Power Equipment Spring is at hand. Get out of the house and get some sunshine. It's good for the body and soul. While you're at it, get some yard work accomplished. It's good for your lawn, and the exercise is great for your health. Here are six lawn-care tips for new grass and old. Seeds—A Good Place to Start Quantity and coverage are equally important when seeding a lawn. Use plenty of seed and spread it evenly. Over-seeding an existing lawn can flesh out thin spots. To replenish an existing lawn, spreading 3 or 4 lbs. of seed per 1,000 square feet should suffice. A brand new lawn requires as much as 6 to 8 lbs. per 1,000 sq. feet. Prior to spreading the seed, rake away loose thatch and debris. Use a sharp garden tool (rake, hoe, etc.) to till the soil of bare spots and thin areas 1/4 to 1/2 inch deep. Spread the seed in a crisscross pattern, using a spreading device for even coverage. Even an inexpensive handheld seed spreader will get better results than spreading by hand. After spreading the seed, use a rake to work it below the surface of the soil. Then, spread fertilizer. Some products are available as a mixture of seed and fertilizer. Otherwise, follow the planting with a good “starter” fertilizer that has a high middle number (phosphorous), e.g., 20-27-5, which is the most common retail starter fertilizer. Watering New Seeds For new grass seeds, during the germination period water twice a day, 10 minutes per watered area. To keep the top inch of soil moist, it’s best to water lightly often rather than deeply once a day. Seeds germinate in 2 to 3 weeks, depending on the type. Once the seeds have germinated, keep a consistent watering schedule, but account for weather conditions, because over-watering can cause grass disease. The ideal time to water your grass is between 4 a.m. and 6 a.m. If possible, avoid watering new lawns in the evening. Sodding a Lawn To establish a new lawn quickly on bare ground, sod is the way to go. Pro landscapers use specialized equipment to sod a lawn, such as a tractor with a rear-mounted sod-laying attachment which is fitted with a large spool of sod (backed with mesh) that unrolls over the ground in strips. The DIY method is to have pallets of sod delivered to the home and recruit some helpers to lay the sod on bare, tilled soil in tightly spaced rows, each square butted end to end without overlapping. Hatchets and garden tools can be used to cut the sod squares to fit around obstacles and follow the property lines. Any gaps can be filled with topsoil and seed. Watering New Sod Proper watering is critical to establishing new sod. Immediately after installing, water the lawn thoroughly so the sod is spongy when stepped on. New sod must be kept damp so the grass can take root. The sod should be kept wet 4 to 6 inches deep and watered 3 to 5 times a day during the first two weeks (depending on season). Lift a corner of the sod to determine the depth of moisture. Avoid foot traffic while the lawn establishes. The new sod should never dry out, even during hot weather. At the end of the second week, allow the lawn to dry enough so you can mow, then transition from frequent daily watering to fewer cycles per day—but don’t allow the sod to dry out. During week 4, water once or twice every other day. By week 5, the new lawn should be able to go 2-3 days between watering. Mowing Height When mowing a lawn, homeowners often set their mower blades too low and “scalp” the lawn, which can lead to thin and dying grass and shallow root systems. Each grass type has a height range that is ideal for its health, looks and resilience. The depth of the root system directly correlates to the height it should be mowed. The higher you cut the grass, the deeper the roots will grow. The deeper the roots, the more water the grass can absorb, which means you don’t need to water the lawn as often. Two types of grasses are most common for lawns. Cool Season grasses include Fescue, Bluegrass, and Ryegrass, and are most common in the Southeast. These grasses like to be mowed at a range of 2-1/2 to 3-1/2 inches high. Fescue looks best at least 3 inches high. Bluegrass is most tolerant to lower mowing, but should be left at least 2-1/2 inches. The second type is Warm Season grasses, such as Bermuda, Zoysia, and Centipede. These grasses tolerate as low a cutting as most homeowner’s mowers will cut. For warm season grasses, a home lawn looks good 1 inch high, if the yard has a smooth grade. Weed Control Pre-emergent products control weeds before they germinate. Post-emergent products kill existing weeds. For proper weed control, use the right product at the right time (for the right weed). After weeds have already emerged on your lawn, you’ll need a post-emergent herbicide, which is categorized as selective or non-selective. For example, Roundup is non-selective, meaning it tries to kill most all plants. Be careful using such products, because non-selective herbicides often kill all vegetation, destroy the nutrients in the soil, and prevent any vegetation from surviving—including any grass the chemical contacts. Selective herbicides kill specific types of plants, such as broadleaf weeds. Certain selective herbicides can control broadleaf weeds in warm-season turf grass, control of grassy weeds in Zoysia turf, etc. Read the product packaging carefully to choose the right post-emergent herbicide for your specific needs.
- 15 New Home Improvement Products for 2026
Many new home-improvement products are rolling out early this year, so here is a roundup of some noteworthy news. TruExterior 5/8” Lap Siding www.westlakeroyalbuildingproducts.com A finalist for the 2026 Best of IBS Awards, TruExterior 5/8-inch Lap Siding combines the appearance and shadow lines of traditional lap siding with the high-performance attributes of TruExterior’s poly-ash material. The siding profile has a true 5/8-inch butt and a sought-after aesthetic that mimics real cedar. Poly-ash is a proprietary blend of polymers and fly ash that provides for a high level of dimensional stability and resistance to warping, cracking and splitting. As a result, the siding requires no sealing of ends or cuts in the field, it can be used for ground-contact applications, and it can be painted any color, including dark hues. ODL Hurricane-Rated Fiberglass Doors www.odl.com Another IBS “Best In Show Award” finalist is the Hurricane-Rated Fiberglass Doors from ODL, Inc. During a hurricane, impact-rated products can protect your family and home from harm and are essential to your security and peace of mind. Starting with a solid frame, the ODL high-velocity hurricane zone (HVHZ) approved doors stand strong against storms and high winds, keeping your family and property secure. The doors are certified to meet Florida building codes and Texas Department of Insurance approvals—two distinct markets that set a high standard for impact-rated products. Oneida XT14 Cyclonic HEPA Dust Extractor www.oneida-air.com Winner of Wood Magazine's 2026 Innovation Award, the new Oneida XT14 Cyclonic HEPA Dust Extractor is an industrial-grade vacuum that won't lose suction. Its patented cyclone separator eliminates filter clogging and suction loss, ensuring that its powerful vacuum motor keeps working at peak efficiency. The patented, anti-static cyclone automatically cleans up to 99.9 percent of bulk debris and fine dusts from the airstream before it clogs the filter, containing it safely in the dust bin. The premium HEPA filter works at peak efficiency out-of-the-box (i.e. it requires no seasoning) and features wide-spaced pleating as well as a non-stick coating for quick and easy maintenance. The powerful 1.5-hp motor delivers ample airflow for common handheld and benchtop tools. It runs on convenient 120V power with a long lifespan of 1,100+ hours. The mobile dust bin combined with the Oneida XT's low height and compact footprint make it ideal for bringing to the jobsite or installing into existing production lines. Ryobi 40V HP Brushless Hybrid 18" Misting Air Cannon www.homedepot.com Ryobi introduces the all-new 40V HP Brushless Hybrid 18-in. Misting Air Cannon (RY40MF01B) to its powerful line of 40V HP Brushless products. With this all-new Misting Air Cannon, you can instantly experience temperatures up to 15 degrees cooler across a 20-foot range utilizing the misting feature by connecting to a garden hose or directly pumping water from a bucket. The air cannon's durable metal construction, integrated hose storage, and 6-inch all-terrain wheels make traveling easy, while the extended pivoting handle makes pulling or pushing the fan a breeze. 2-in-1 Flooring Nailer & Stapler www.metabo-hpt.com Designed for fast and efficient hardwood floor installations, the Metabo HPT N5010AC accommodates both 16-Gauge L-shaped cleat nails and 15.5-Gauge 1/2-inch crown flooring staples, up to 2 inches in length. It comes with an interchangeable base plate that supports 1/2 and 3/4 tongue-and-groove flooring for quick work onsite. The tool’s mallet-actuated drive and extra-wide aluminum base plate ensure accurate fastener placement and tool stability, improving speed while reducing fatigue. The tool is built with a high-grade aluminum magazine and supported by a 5-year limited warranty. Scrigit Wide Blade www.scrigit-scraper.com The Scrigit Scraper is an inexpensive, pen-sized, non-scratch cleaning device that provides a quick and convenient way to remove small amounts of unwanted substances from household and automotive surfaces, edges, and grooves where a metal scraper would scratch or damage the work surface. It can be used instead of fingernails and metal tools to quickly clean off small areas of unwanted substances, such as grime, caulk, putty, wax, latex paint, adhesive stickers, labels and tape. The resin blade won’t scratch or gouge wood the way a metal blade can do. For woodworking projects, it also works well as a small putty knife for filling nail holes. The small blade size scoops less putty so it applies less putty around the nail hole, which reduces cleanup and conserves product. Two sizes are available, including the new “wide blade” model made in the USA of a durable plastic resin that easily washes clean and won’t conduct electricity. Trex Select Decking with SunComfortable Technology www.trex.com Trex’s Select decking is one of the industry’s most advanced mid-priced composite decking options. Featuring the brand’s SunComfortable heat-mitigating technology, the latest additions to the popular Select line are engineered to reflect the sun and help keep the surface cooler underfoot, delivering enhanced performance without compromising durability or value. Trex Select features monochromatic and multi-tonal colors and is backed by a 35-year limited residential warranty. Typar Clear Acrylic Flashing www.typar.com Typar has been named the 2026 Spark Award winner by the National Association of Home Builders (NAHB) Leading Suppliers Council for its Clear Acrylic Flashing, an industry-first solution designed to improve installation accuracy, inspection confidence and long-term building performance. The Spark Award recognizes building products that demonstrate forward-thinking innovation and meaningful impact across the residential construction value chain. TYPAR Clear Acrylic Flashing was honored for addressing a long-standing jobsite challenge: the inability to visually verify fastener placement and flashing integration once opaque materials are installed. Unlike traditional flashing products, TYPAR Clear Acrylic Flashing is truly transparent, allowing builders, inspectors and installers to clearly see window and door nailing fins, fastener patterns, and overlaps during and after installation. This added visibility supports more confident inspections, reduces the risk of installation errors, and helps streamline workflows across residential and multifamily projects. Continental Exterior Laminates www.continental-industry.com Continental’s portfolio of exterior laminate products can enhance outdoor living spaces from floor to ceiling. Through its Woodec Collection and Mattex Shine Series, Continental offers sophisticated vinyl window profiles, surfaces for front doors and garage doors, and stylish façade elements that are maintenance-free, wind and weather resistant, and engineered to withstand demanding outdoor conditions. Continental exterior films for building components have a modern look, a wide range of applications, and almost indestructible material properties. Continental exterior films feature cool colors technology which reduces heating of window profiles, even when exposed to intense sunlight. “There is truly no limit in how Continental’s exterior laminates can be used from enhancing railings and fencing to using laminated products in outdoor kitchens, on cladding, siding and garage doors,” says Marco Patermann, Continental Surface Solutions, North America. Level.Up Paver Pedestals www.level-updecking.com A “Best In Show Award” finalist at the 2026 International Builders Show (IBS), the Level.Up Paver Pedestals from DAP/Bison Innovative Products simplify the construction of elevated, on-grade patio paver decks by reducing ground preparation and installation time. The telescoping pedestals easily twist to raise or lower height for a level surface. Each pedestal supports 750 pounds, and they are weather-, freeze-, and mold-resistant. Novus Decking www.fiberondecking.com Novus fused decking pairs a groundbreaking photo-realistic wood appearance with a new-to-the-industry thermoset shell that prevents scratches and dents, culminating in an innovative approach to composite decking. “Using precise image-capture technology, we preserved the genuine appearance of real wood and fused it to our Novus deck boards for an authentic look that lasts—all backed by a 50-year warranty,” says Eric Dotson, vice president, product management for outdoors B2B at Fortune Brands. Designed after cedar and the Brazilian hardwood ipe trees, exotic woods that traditionally come with hefty price tags, Novus brings luxury aesthetics with a sustainable advantage. Like Fiberon’s other composite collections, Novus is built with recycled plastics and reclaimed wood, helping to reduce deforestation. Available in three natural colors, Novus decking is also Fiberon’s most slip-resistant board ever. Bosch 18V Outdoor Equipment and Expert Batteries www.boschtools.com Bosch Power Tools has launched a mew 18V Outdoor Power equipment Platform. These high-quality cordless tools include an 8-in. Pruning Saw and 10-in. Pole Chainsaw, both with brushless motors. Also in the lineup is a 20-in. Pole Hedge Trimmer, 24-in. Hedge Trimmer, a String Trimmer and Blower. Bosch has also launched its new Expert 18V batteries, which offer significantly more power and longer runtime. Thanks to advanced features like tabless cell technology (4 Ah EXBA18V-40 & EXBA18V-80 8 Ah) and high-power 21700 cells, these batteries can deliver more instantaneous power for demanding tasks and last longer on a single charge compared to previous generations. Owens Corning EZSheath Structural Insulated Sheathing www.owenscorning.com/ezsheath Owens Corning EZSheath Structural Insulated Sheathing (SIS) is a 4-in-1 composite insulation system that integrates structural sheathing, continuous insulation, and air/weather protection into a single, easy-to-install system. Engineered to meet today’s and tomorrow’s energy codes, EZSheath Structural Insulated Sheathing combines the thermal and air and water-barrier performance of FOAMULAR NGX insulation with structural durability. The innovative design helps builders finish installation fast and conserves square footage while meeting performance and code requirements. Pairing structural sheathing with thermal performance, EZSheath delivers the racking strength and nail retention today’s builders expect. EZSheath holds tight and delivers a dependable R-5 or R-10 while also acting as an air and weather barrier, even under harsh conditions. It is designed to maintain structural strength and racking strength. It is designed to boost efficiency on the jobsite by supporting faster installs and enabling installers to make fewer trips around the house. Up to 50 percent lighter than OSB, EZSheath is easy to handle and needs fewer layers than traditional assemblies. It requires no additional house wrap or air and weather barrier protection. Simply fasten the panels and tape joints with EasySeal tape. Honeywell Home ElitePRO Smart Thermostat and Whole Home Dehumidifier Resideo Technologies received two industry awards for the Honeywell Home ElitePRO smart thermostat and the Honeywell Home Whole Home Dehumidifier . The Honeywell Home ElitePRO smart thermostat was honored with the Pro Builder MVP Award for going beyond the expectations of a thermostat to provide an intuitive user interface on a sleek, five-inch touchscreen. Designed to help contractors deliver next-level comfort and convenience, the ElitePRO S1200 smart thermostat streams live video from compatible doorbells, offers seamless indoor air quality (IAQ) monitoring and control, and is ideal for customers seeking a stylish, smart and energy-efficient solution. The Honeywell Home Whole Home Dehumidifier won the NAHB Global Innovation Silver Award after being re-designed from the ground up to deliver the ultimate performance, efficiency and quality. The Honeywell Home dehumidifier features a tri-directional outlet for flexible, tight-space professional installation. It offers serviceable components, advanced diagnostics to help eliminate guesswork during a service call and the 65-PPD unit is the only product in its class with ENERGY STAR certification. Signature 900 Smart Hybrid Heat Pump Water Heater www.aosmithatlowes.com The A. O. Smith Signature 900 Smart Hybrid Heat Pump Water Heater with Hot Water Plus was named a winner in Good Housekeeping 's 2026 Home Renovation Awards . Available exclusively at Lowe's, the Energy Star-certified line of smart hybrid heat pump water heaters was recognized in the "Sustainability Innovators" category for its ability to provide significant energy and utility savings in the home with maximum hot water delivery. The award-winning line delivers up to 40 percent more hot water when needed at the lowest possible operating cost, along with added features—including integrated “smart” home connectivity and leak-protection technology, built-in load shifting capabilities for even more savings, whisper-quiet operation and more. Compared to a standard electric water heater, they're four times more efficient and reduce energy costs by more than 75 percent, saving homeowners at least $600 per year on utility bills., according to A.O. Smith. For additional up-front savings, they also qualify for state and local utility incentives, including instant rebates as high as $1,600.
- Need an Extension? Find the Right Advice for Your Own Backyard
At Home Improvement & Repairs , we try to bring our readers information that is generally applicable to American homeowners, but when it comes to seasonal issues, that is easier said than done. It’s no surprise that the climate differs greatly between northern states like Maine and southern states like Alabama, but there may also be seasonal differences between next-door neighbors like Tennessee and Alabama. Learning how to adapt the management of your property to accommodate the climate in your area can make your work more productive. Your local county extension office is a perfect place to find the particular information for your part of the country. In other words, if you’re a gardener, farmer, or even a lawn-care enthusiast, you should bookmark your local extension office as a valuable source of agricultural information. Born from the Smith-Lever Act in 1914, the Cooperative Extension System (CES) is a partnership between federal, state and local governments that provides informal education regarding land management, crop information, and more. Your local county extension office partners with universities and local professionals to provide information surrounding a wide variety of topics, from agricultural advice for rural landowners to planting schedules for urban gardeners. Our magazine is based in Alabama, and I have recently been writing a column for our local community. When I needed to cover spring lawn-care advice for the folks in our state, I queried the Alabama County Extension Office, which partners with Auburn University, to get all the particulars. I am happy to report that they were easy to work with and provided insightful guidance regarding fertilization, mowing, watering, and weed control advice for our state. The research-backed information provided by your local extension office is generally provided as a free service. Look up your local branch to get the details you need for the best practices in your area. -- Matt Weber , editor Side Note How to Find Your Extension Office To find a specific extension office in your area, visit one of the national lists below and click your state. On the state extension website, look for sections like "Find Your Local Office," "County Offices," "Locations," or use a county search tool/map. Many states also have dedicated county-level directories with addresses, phone numbers, and websites(e.g., Alabama , Georgia , California ). National/State-Level Starting Points Extension.org 's "Find Extension in Your State" : A centralized list linking to each state's Cooperative Extension main site (from which you can navigate to county/local offices). https://extension.org/find-cooperative-extension-in-your-state USDA NIFA Land-Grant Colleges and Universities Partner Website Directory (filter by "Extension" type): Links to the main extension websites for each state/territory's land-grant institutions. From there, look for "county offices," "local offices," or a search tool. https://nifa.usda.gov/land-grant-colleges-and-universities-partner-website-directory (select state and type=Extension) National Pesticide Information Center (NPIC) County Extension Offices List : Provides clickable links by state to find local county extension contacts (originally for pest/gardening questions but covers general extension offices). http://npic.orst.edu/pest/countyext.htm (click your state for a list or directory link) University of Arkansas Extension's List of U.S. Extension Offices : A helpful compiled list of links to each state's main extension service (many lead to county finders). https://www.uaex.uada.edu/about-extension/united-states-extension-offices.aspx PickYourOwn.org County Extension Agent Offices Guide : Includes a map and state-by-state links to locate local offices. https://www.pickyourown.org/countyextensionagentoffices.htm
- Preview of International Builders' Show 2026
Get ready for the largest annual residential construction show in the world, the 2026 International Builders' Show (IBS) , which brings more than 70,000 industry professionals, over 1,700 top companies and brands, and 120 powerhouse education sessions to Orlando, Florida. This is the construction pro’s chance to explore the latest products, connect with the best in the business, and gain insights they won’t find anywhere else. Can’t make it to Orlando? Then leave it to the HIR staff to give you the scoop on new products soon to be on display at IBS. Check out this roundup of new items for 2026. Surestone Decking Booth W2573 Deckorators offers its exclusive Surestone Technology to provide enduring value with the company’s industry-leading warranties. This decking is manufactured with mineral-based technology which withstands all seasons and lasts a lifetime. The decking combines distinctly natural wood-grain patterns with rich colors, a unique surface design for increased traction in wet conditions, and exceptional stability with minimal thermal expansion or contraction. Surestone Decking is warranted for installation in the ground or water with virtually no moisture absorption, and it’s 35 percent lighter than traditional composites. www.deckorators.com FrogTape Pro Grade Deck and Joist Flashing Tape Booth S11141 From excellent adhesion and holding power to easy hand tearability and clean removal, you can trust Shurtape Technologies to deliver the product features to get the job done quickly and efficiently. FrogTape Pro Grade Deck and Joist Flashing Tape is an all-weather, high-performance flashing tape used to waterproof deck joists, stair stringers, posts and ledger boards with a layer of protection. www.frogtape.com Lilypad Paint and Primer Booth W7493 Adept Materials develops smart building products powered by patented Vaporwisp technology, first created in a physics laboratory at Brown University. The materials are engineered to respond to their environment, redefining how vapor, humidity, and temperature are managed throughout the building envelope. Lilypad Paint is the first product launched with this technology. The company is now expanding Vaporwisp into weather-resistant wraps, integrated sheathing, and roofing underlayments to deliver new adaptive, high-performance materials. www.lilypadpaint.com Lodge Gazebo Booth S2163 Elevate your backyard with the Lodge Gazebo from Backyard Discovery. Premium cedar and black steel create bold lodge-style architecture, while a snow- and wind-rated steel roof delivers weather strength and quick assembly. Charming meets contemporary in this large kit-built gazebo, featuring heavy-duty cedar beams and sleek steel accents. www.backyarddiscovery.com GlasArmor Ballistic Resistant Composite Panels Booth W5783 Are you hiding from the cartel? Have you lost confidence in your witness protection program? Are you just extremely unpopular? Ballistic-resistant composite panels from Avient Corporation are constructed to provide military-grade protection from armed attackers at your home or any facility. Fiber-reinforced polymer composites provide superior ballistic protection at considerably less weight than comparable steel or concrete panels. Leverage this unique composite matrix and its custom capabilities for complete retention of projectiles in a variety of protective structural applications. www.avient.com Oversized Architectural Wood Doors Booth W3183 US Door & More Inc. manufactures premium wood doors built for design-focused homes and high-performance applications. The company produces custom entry, interior, pivot, and specialty doors using solid materials, precise engineering and modern craftsmanship. Each door is made to order and sized to fit the project. The company offers large-format wood doors up to 72x120+, built with engineered cores and CNC precision for homes seeking dramatic, clean-lined entryways. www.doornmore.com HandyScribe Booth S13152 The HandyScribe is “the world’s first cam-shaped pencil” to serve as a breakthrough in marking tools. It is engineered specifically for professionals and DIY’ers who demand precision and durability, and the HandyScribe can be used to scribe shapes and contours on all building material surfaces—wood, tile, metals and more. www.handyscribe.com Poplar Bark Wall Coverings Booth W7447 BarkClad’s poplar wall slabs are solid pieces of poplar bark sold as 4 ft by 8 ft sheets or larger. These pieces are hand-harvested and unique, as each slab has its own texture and colors. BarkClad natural poplar bark is offered in three grades to perfectly suit any project, whether indoors or out. The Super Premium grade averages 1 to 1-1/2 inch thick, the Exterior Standard is between 5/8 and 7/8 inch thick, and the Interior grade averages 1/2 inch or less in thickness. www.barkclad.com Crazy Padded Wall Tiles Booth S4169 Are your kids driving you insane? Does your job make you nuts? Custom Padded Wall Tiles from Crazy Ape Extreme Equipment might be the room upgrade you need. They also work for your golf simulator room, trampoline room, basketball or tennis court. Any wall or floor surface which requires an extra layer protection for your athlete or disturbed family member can now be padded for greater safety and better protection from impact. https://crazyape.shop/ Old Chicago Herringbone Brick Wall Panel Booth W7689 Experience the timeless charm of rustic elegance with the Old Chicago Brick Faux Wall Panel from Barron Designs. Crafted meticulously, this exquisite faux wall panel captures the allure and dimension of real herringbone. Made from high-density polyurethane foam and light enough for anyone to handle, these faux brick wall panels resist chipping, fading, deterioration, and weather conditions. www.barrondesigns.com Carrier Smart Thermostat featuring InteliSense Technology Booth W6267 The Carrier Smart Thermostat with InteliSense delivers effortless control, proactive service, energy savings and future-ready features. The Carrier Smart Thermostat combines clean, contemporary design with cutting-edge functionality. It integrates seamlessly into your home while providing convenient control over your comfort. With the Carrier SmartHome app, you can set customized schedules for energy savings while you're asleep or away, and optimize comfort when you're home. www.carrier.com Backlit Bar Booth S13028 Customizable panels allow for backlighting of any countertop or surface. ThinLight Technologies delivers ultra-thin, high-performance lighting solutions designed to elevate modern residential spaces. Seamlessly integrated into counters, walls, fireplaces and architectural details, ThinLight’s innovative lighting provides uniform illumination, energy efficiency, and a sleek, low-profile design that enhances both aesthetics and functionality. Ideal for today’s design-driven homes, ThinLight works with builders and designers to create customized lighting solutions that add visual impact, simplify installation, and help differentiate homes. www.thinlightusa.com The ONE Booth S17083 Flame-tec LLC is an industry leader in smart controls for fireplaces, firepits, torches and outdoor fire features. The ONE is a universal fireplace controller. It works with most major brands to connect your cell phone to control all the features of your fireplace, from anywhere you have wifi or cellular access. www.flame-tec.com Trex Select Aluminum Railing Booth S4095 Trex offers the industry’s most comprehensive deck railing selections, including new panelized solutions in steel, aluminum and composite. Offering a step up in weatherability, Trex Select Aluminum Railing combines elegance and simplicity with easy-to-install panels available in a choice of Charcoal Black or Burnished Bronze. The clean, modern design enhances sightlines while providing durability and ease of maintenance backed by a 25-year limited residential warranty. The Trex Deck Railing Designer introduced this year is an intuitive 3D tool that simplifies railing selection and quoting. www.trex.com Solo Booth W7661 With a sleek, all-in-one design, the Solo (1 ton) heat pump system from Ortech Industries has no outdoor unit, preserving building aesthetics. A drain-pan heater helps evaporate water in the drain pan to reduce chance of freezing. The advanced inverter compressor and variable-speed motor ensure high efficiency and whisper-quiet performance. It is designed for easy installation and operation, and it efficiently expels and intakes air through just two small wall ducts, reducing structural impact and maintaining the aesthetics of your building. Enjoy year-round comfort with seamless heating and cooling in a single, energy-efficient unit. www.ortechindustries.ca Magnifique Classic Door Set with Rosewood Knobs Booth S11122 Experience luxury with Copper Mountain Hardware’s Magnifique Classic Door Set, crafted from solid brass and paired with rich rosewood knobs. Known for their natural warmth and timeless beauty, each knob is unique in grain and tone. This high-end doorknob set installs effortlessly in under two minutes, bringing sophistication and quality to any home with ease. www.ortechindustries.ca NoMud 90 16" Booth W5653 Say goodbye to corner bead and hello to a faster and easier solution for drywall corners. The No-Mud 90 16-inch from CleanCo Construction is a prefabricated drywall corner that replaces metal corner bead. It installs without mudding or sanding, reducing labor time while delivering a consistent appearance. It offers an incredibly durable finish to prevent cracked corners, and it effortlessly adapts to unique wall shapes, columns, recessed lighting, woodwork applied to walls, bay windows and more. The NoMud 90 is also available in different sizes. www.CleanCoConstruction.com Compack 180 – Folding Door System Booth S10029 The new Compack 180 – Folding Door System from Milcasa Renovation has been re-engineered for modern interiors. It opens 180 degrees flat against the wall, making more space available even in cramped quarters. It has no floor track, features easier installation, and is compatible with 6.5-inch walls. The Compack 180 System is a functional alternative to all types of folding doors. No modifications to walls are necessary. It has no sliding or rolling members, and the door moves fluidly without a sound. Prolonged use does not compromise the quality of the movement. www.milcasastore.com
- Install a Wood Ceiling
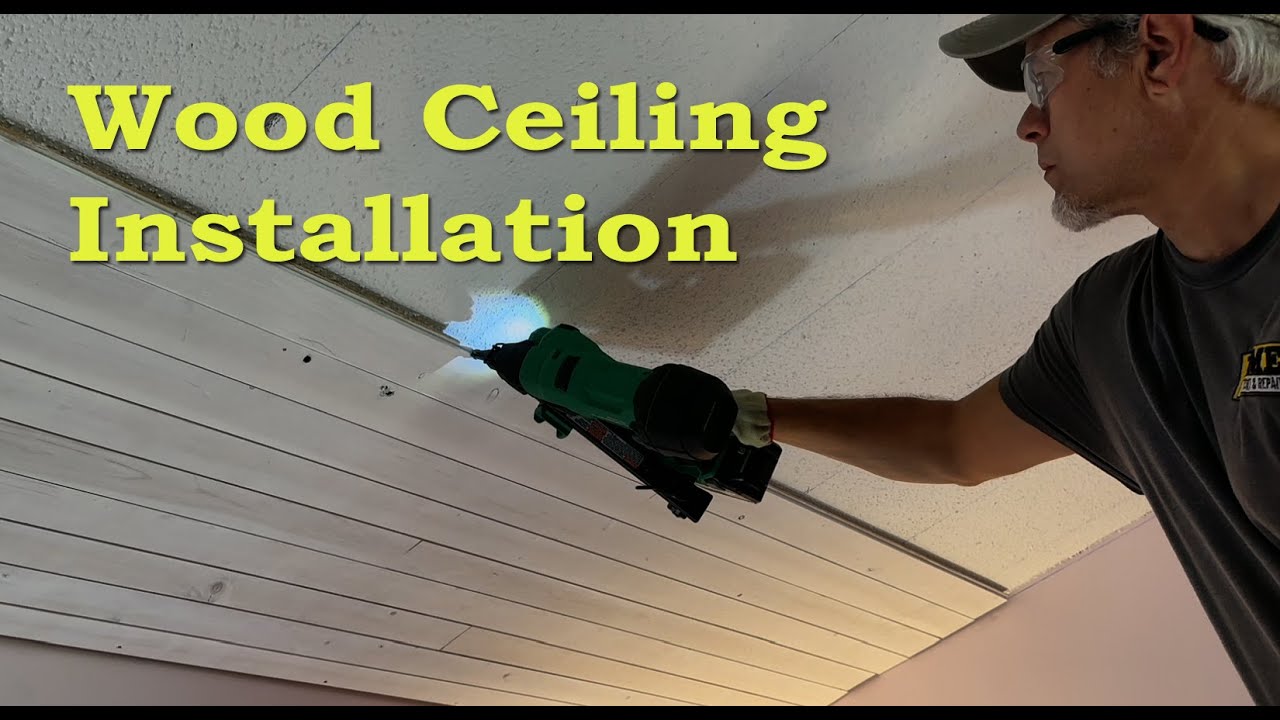
By Matt Weber Installing tongue-and-groove wood boards onto a ceiling is a popular project that provides a room warmth, character and a classic look. When updating the look of a little girl’s bedroom, we wanted a more stylish look for the ceiling than the “sea of cottage cheese” appearance of acoustical texture, which was popular among homebuilders for hiding drywall flaws and providing sound dampening. We considered scraping, refinishing and painting the ceiling, but that’s a messy chore and in the end, although we will have removed the texture, we will not have added much character. Since rustic wood was a recurring design theme throughout the home, we selected tongue-and-groove (T&G) cypress boards to cover the ceiling texture and continue the theme. The Basics The instructions covered in this article generally apply to a standard interior installation (e.g., cypress, pine, cedar, or similar softwood boards, often 1x4 or 1x6). Always check local building codes for any restrictions in your area. When ordering the T&G boards, calculate the square footage of the room and add 10 to 15 percent extra for cuts, waste and defects. For trim and molding around the perimeter edges, we selected 1x4 boards to match the ceiling, but the trim boards are square on all sides. The tools required include a stud finder, chalk line, measuring tape, 4-foot level, miter saw or circular saw, nail gun and ladder. I will point out a few other recommended items throughout the article. If your boards arrive unfinished, then you’ll also need paint and related equipment. For this project we chose Southern Cypress, known for its durability, versatility and its beautiful woodgrain character, which is why we selected it for this rustic style ceiling. To preserve its natural character, we applied a thin coat of whitewash paint, which still allowed the grain to show through the finish. Important T&G tip: If you are installing boards with a decorative gap along the joint, then it is critical to recognize that the gap only exists on one side of the board, not the other. This means the boards are not symmetrical, so it's very important to keep that in mind and orient the boards correctly when you're painting and installing them. Plan and Prepare The basic preparation steps of wood-flooring installation also apply to this project. First, acclimate the boards in the room for 3–5 days so they adjust to temperature and humidity, because wood expands and contracts with changes. T&G boards require a very flat and level installation for the tongues to fit into the grooves along the joint. When a board bends against an uneven substrate, the joints will not align which makes it difficult to connect the boards. Even if the boards you're installing do not have tongue and groove joints (such as shiplap, etc.), it's still a good idea to check the flatness of your ceiling, because if you nail boards directly to an uneven ceiling, then you will have uneven gaps along the edges that become noticeable when you install trim around the perimeter. To make sure the ceiling is flat, snap level chalk lines along the walls just below the ceiling. Measure the distance between the chalk line and ceiling to ensure its flatness. In some cases, you can mark uneven areas of the ceiling where shims can be installed behind the boards to compensate for dips. Any projections should be sanded flat. If the ceiling is uneven, you can first install 1x2 or 1x3 furring strips perpendicular to the planned board direction, spacing them 16 to 24 inches apart, and fastening them securely into the joists. The strongest and most common way to install the T&G boards is to orient them perpendicular to the ceiling joists. However, installing furring strips perpendicular to the joists can provide a nailing surface if you want to run the T&G boards parallel to the joists. First step is to find the joists with a stud finder and mark them with chalk lines. The rustic character of rich Southern Cypress enhances the style of a bedroom remodel. Check out our video of this project! Installation Procedure The installation of the T&G boards requires a 1/4- to 1/2-inch expansion gap around the entire perimeter (walls) to prevent buckling from seasonal movement. Measure the room dimensions. Divide the width of the room by the exposed width of the T&G boards. If you have a small remainder to indicate a noticeably thin board along the last row of the ceiling., then you can rip the first row thinner on a table saw to allow more room for the final row. I recommend cutting off the groove joint of the first row of boards so you can align the square edge along the wall and fasten it to the ceiling securely through solid wood. The tongue should be facing outward. When positioning the first board, remember to insert temporary spacers between the board and the wall. Measure the distance from the first board to the end of the first row, then cut and install a board to fit. Begin the second row of boards with the cutoff remainder of the first row. Then measure to the end of row two. Cut and install a board to fit. Proceed with this pattern from row to row. Avoid aligning the end seams in a straight line between rows. Stagger the end joints by at least 12 to 24 inches for a random, natural look. Some installers prefer to begin installation in the center of the room and work outward. However, if a fixture in the room’s center requires installation of two boards instead of one, then it is critical to install the two center boards in perfect alignment with each other, or you will have alignment issues with the boards that follow. Joining and Fastening To help disguise the end joints between the boards, I recommend cutting the ends at 45-degree bevels and applying matching paint to the exposed wood. For the first and last rows, I fastened the boards with trim-head screws which would ultimately be concealed by the perimeter trim boards. I fastened the majority of the boards by blind-nailing them with a 15-gauge finish nailer and 2-1/2-inch nails. “Blind-nailing” is a technique to drive the nail at a 45-degree angle through the tongue of the joint and into the ceiling joist. Installation of the following row will conceal the fasteners from view. Blind-nail the T&G boards into the ceiling framing where they cross each joist. The rows interlock along the edges with T&G connections, which can be joined tightly with encouragement from a tapping block and a hammer. For the last rows, switch back to screws when you run out of room for the nail gun. The final row is screwed through the face along the edge, and the screws are then concealed by the trim. The trim boards along the ceiling edges were square on all sides. Since they would be so prominent, I was careful to select boards with the most interesting grain patterns. The trim is fastened to the wall studs with finish nails, and I filled the fastener holes with spackling. Final Tool Tips If you need to rip your first and last row to thinner widths, then using a table saw with a rip fence is the easiest way to accomplish this task. Once installation of the boards reached the ceiling fan location, I realized that my can of spackling matched the size of the electrical box, so I used it as a template to trace the shape on the boards and make the cutout using a jigsaw. The T&G boards left the fan box too recessed into the ceiling, so I screwed an extension ring onto the box. You might find a pry bar useful for applying pressure to close the end joints between the boards. If you do so, be sure only to leverage the pry bar against the top plate of the wall and not against unsupported drywall (or you can damage the wall). Other useful tools include a ladder with holder slots to keep tools close by. One such tool is a putty knife, which can serve as a prying device to slip behind bowed boards to adjust their joint alignment. A laser distance meter can take quick board-length measurements at the press of a button and with greater accuracy than a tape measure. This is a highly recommended tool for pros or serious DIY’ers. Recruiting an assistant will be a big help on this project, but for those of us working alone, a cabinet jack can help to position the boards against the ceiling. Trim installation is fairly straightforward, but it’s common to find a buildup of drywall compound in the wall corners. It might be helpful to remove wood material in a beveling method from the back of the trim with a power sander to ensure a better fit inside such corners. Once the project was complete, the new rustic Cypress ceiling looked much more stylish than the old, outdated popcorn texture. Next step is to repaint the room and add matching trim around the windows and the doors. -- Special Thanks: I would like to thank Roy's Wood Products for supplying the beautiful Cypress lumber, and thanks to S outhern Cypress Manufacturers Association for supporting this project. For more, visit www.cypressinfo.org and www.royswoodproducts.com .
- Extreme Weather Readiness for Your Home
Mother Nature is certainly making her presence known across the USA this winter. Different storms require different preparation, and advance warning can give you the chance to get ahead of potential damage. Keep a close eye on forecasts for severe weather events and prepare your home before a storm hits. While you can’t prepare your house for every possible storm, taking small steps today could prevent costly repairs later down the road. Help prepare your home for extreme weather by: Checking and cleaning gutters and downspouts to ensure proper drainage. Inspecting your roof , chimney, and attic for damage. Look for visible damage like missing or cracked shingles, or for signs of moisture, leaks, or mold. Keeping insurance and records up-to-date. Confirm coverage limits and check for specific add-ons, such as flood or earthquake insurance. Creating an up-to-date home inventory with photos and receipts. Store copies digitally as well as off-site. Winter Storms Winter storms can catch you by surprise if you live in an area that doesn’t experience them often. To prepare, you can: Stock up on emergency supplies, such as non-perishable food, prescription medicine, pet food, and first aid supplies. Check if you have a properly vented heat source, like a fireplace, wood stove, or space heater. Make sure your carbon monoxide detector is working properly. Gather extra blankets and clothes to keep at your home and in your car, including mittens, hats, boots, and coats. Hurricanes Hurricanes and flood events are often forecast weeks ahead of time. Monitor forecasts and act early: Board up your windows or close your storm shutters, if you have them. Use sandbags to prevent flooding around the foundation of your home. Tie down or tie together large outdoor furniture and move small outdoor items indoors. Stock up on non-perishable food, drinking water and pet food. Fill your car with gas and stock up on gas for your generator, if you have one. Move your car to higher ground if you’re concerned about flooding. Charge your devices and make sure flashlights and other small electronics have new batteries. If you live in an area that might be evacuated during a storm, make an emergency preparedness plan. Pack a “go bag” with your vital documents, medications, clothing, cash and other essentials, and decide where you will go in case of an evacuation. Heat Waves Unlike other severe weather, heat waves can last for weeks or even months. To prepare: Weather-proof your home affordably by weather-stripping doors and windows, using window reflectors, or covering windows with shades. Spend time in cooler public spaces, like libraries or shopping malls, if you don’t have AC. Watch for signs of heat-related illnesses. Steps to Take After Weather Hits Once it’s safe, assess your home for damage and gather documentation to file a claim with your insurance provider, if necessary. Carefully examine your home and property for hazards such as downed power lines or structural damage, like cracks or leaning walls. Don’t enter a building if you’re not sure it’s safe. Take note of any damage to your property, buildings, and belongings. Write down a detailed description and take photos and videos of the items and damages. Note the date and time, too. Contact a professional to conduct a more thorough investigation for structural damage, water damage, or other problems, if necessary. If any utilities aren’t visibly damaged or aren’t working properly, contact your provider and report it. Contact your insurance company and begin the claim process, if necessary. Keep thorough records and receipts when you get quotes from contractors. 6. Only 30 percent of surveyed homeowners have reviewed their policy to understand what is and isn't covered for severe weather or storm damage. Don’t wait until after a storm to learn what your policy includes. A Note from Our Editor The winter of 2026 is not playing around. Homeowners stranded with no power would probably prefer a little global warming over January’s frigid sheet of ice. The best protection for extreme weather is preparation. A great deal of winter damage comes from trees weighed down with ice and snow, so trim trees and shrubs to remove weak, dead, or overgrown branches to prevent them from falling on your home. Clear your gutters and downspouts to ensure proper drainage which prevents water accumulation and ice dams. Prevent damage from high winds by anchoring exterior items and storing outdoor furniture, grills, trash cans, and decorations. Further steps for preparation include insulating pipes, sealing drafts in the home, and having your heating system serviced. You should also develop a backup plan for power outages. And don’t forget to review your insurance policies. Confirm coverage for specific risks (floods are rarely covered by standard policies) and document your belongings with photos or videos for a home inventory. According to the Hippo Home Insurance “2026 Housepower Report,” homeowners who reported more confidence in extreme weather preparedness were more likely to have purchased add-on insurance coverage, or an insurance rider (66 percent). Gen Z leads adoption, with 76 percent purchasing at least one rider. The most common insurance riders include replacement cost coverage, flood insurance, and water backup or sump-pump overflow protection. Take Ben Franklin’s advice for your home during winter: “An ounce of prevention is worth a pound of cure.” -- Matt Weber -- Special thanks to Hippo Home Insurance for contributing to this article.
- 6 Pro Tips for Moving to a New Home
Are you sick of your surroundings? Heading for greener pastures? Sometimes, you need to relocate. From oversized sofas to prized heirlooms, moving-day problems are rarely caused by boxes alone. According to movers, a couple of household items are responsible for common delays, damage, and injuries from residential moves, often because people underestimate how difficult it can be to move these things. Adrian Iorga, moving expert and founder of Stairhopper Movers , says weight isn’t the biggest issue. Shape, access, stairs and preparation matter, especially in apartments, older homes and buildings with narrow hallways. “People think heavy means difficult, but it’s usually awkward or fragile items that cause the most trouble,” says Iorga. “When those items aren’t prepared correctly, that’s when damage and injuries happen.” Adrian breaks down the items that movers struggle with most, and what homeowners can do to make moving them safer and smoother: 1. Sectional sofas and oversized couches Large sofas often don’t fit through doorways or stairwells, so you need to partially or fully disassemble them. People commonly forget to remove legs, detach modular pieces, or measure tight turns in advance. Taking photos of access points and confirming dimensions ahead of time can prevent last-minute surprises. 2. Large mirrors, glass furniture and artwork These items are lightweight but extremely fragile. Movers see damage when glass isn’t protected with rigid padding or when pieces are carried flat instead of upright. Using proper wrapping materials and keeping glass vertical reduces stress on pressure points. 3. Appliances with hookups Washers, dryers, and refrigerators require proper disconnection and stabilization. Failing to drain hoses, secure drums, or tape doors can lead to leaks, internal damage, or injuries during transport. Appliances should be prepped before moving day whenever possible. 4. Gym equipment and heavy specialty items Treadmills, Pelotons and weight machines are dense, unbalanced, and often top-heavy. Many require partial disassembly to move safely, especially on stairs. Attempting to move them intact significantly increases injury risk. 5. Antiques and sentimental furniture Older or heirloom pieces are often more fragile than they appear. Loose joints, aged wood, and decorative details need extra protection. Over-handling or improper wrapping can cause irreversible damage. 6. Boxes packed too heavily Overloaded boxes are a leading cause of broken items and back injuries. Books, kitchenware, and small heavy items should be distributed across multiple boxes rather than packed together. As Iorga explains, moving is already one of the most stressful days people go through, but the experience can change dramatically with the right preparation. “When the most difficult items are prepared correctly, everything changes: Crews work more efficiently, homes stay protected, and people feel far more in control of what’s happening around them.” For more, visit www.stairhoppers.com .
- 5 Fastening Tips for Window Installation
by Robert Yates Window packages can run upwards of $20,000 depending on the style on a new build or renovation, making it critical to get the installation right the first time - and without damage to the glass or flanges. Fasteners may at times be treated as an incidental or commodity, but they play an underrated role in protecting your profit margin, meeting code, and ensuring long-term integrity. Using nails where screws are a better solution or sub-standard screws can compromise the installation, slow your crew down, or in the case of a damaged window, even shut down a jobsite while you wait for a replacement. Here are five fastener tips that can make or hopefully not break your next window install: Sub-Standard Screws or Nails can Jeopardize the Job In areas without strict building codes, it’s not unusual to see windows installed with incorrect fasteners: drywall screws or large-headed nails. But these fasteners aren’t designed for the job. They can be made with various types of metal, so you may not know the quality you’re getting. For example, they may be more brittle and phosphate-coated, which will not prevent corrosion. Basic nails can break mid-drive, leaving behind a buried stem your crew can’t remove. Worse, the force of driving them can crack the glass or mounting flange when driven through plastic or wooden frames. Since windows can take months to reorder, a single cracked frame or glass panel can halt the jobsite and cost thousands to replace, cutting into your margins. Use screws engineered for window flange attachment, like premium coated wafer-head screws with a wide bearing surface. These offer strong pull-down force without over-driving, which reduces the risk of cracking the frame or glass. A T-Star Plus with superior bit is a good fit for its low-torque drivability, especially for a harder material, to prevent stripping. Look for a corrosive-resistant HCR-X coating for long-term durability. Ensure a Flush Fit for Proper Window Function Not all fasteners provide the same end result. Ideally, windows should glide smoothly and function intuitively without having to give it a second thought. But if the fasteners used are too rigid, they may not deliver a clean, flush finish. A window that isn’t installed plumb and square might look fine at a glance, but it might stick, drag, or not close properly. This can also lead to problems like leaks and drafts. It’s also possible that banging in nails could crack vinyl or dent aluminum frames. This can also affect smooth operation. Screws with tapered heads or reverse-thread designs allow for better countersinking, especially in trim and casing applications, and reduce the need for a do-over or callback. For window trim, use partially threaded screws, typically in white, gold or black, that can be easily backed out if they miss the mark, without damaging the substrate. Then you can go back and caulk the small holes. Speed Up the Install Time is money on a busy jobsite, and the small things that slow you down add up fast. Lower-quality nails and screws often lack self-drilling or serrated tips, meaning your crew has to pre-drill holes in wood, PVC, or composite trim. That’s extra steps, extra tools, and extra time per window. They may also have an unstable bit fit, causing cam-outs, where the driver slips out of the screw head. Nails create their own uncertainty, especially with pneumatic nailers, where you can’t control the power. Drive too much and the flange gets cracked. Premium screws that drive in smoothly create a “gentler,” safer install. Premium fasteners improve strength and jobsite efficiency with no predrilling required, and are designed with a superior bit fit and serrations that achieve more with less torque. That means they start faster, creating a cleaner attachment and quicker, easier fastening with no camming out. Extra time to fasten screws or correct mistakes on a window may seem insignificant, but multiplied across every window in a home or building, the time and labor savings add up. When you’re installing dozens or hundreds of windows, that time saved means staying on schedule, hitting your margins, and moving onto the next phase without delay. Keep Window Installation Protected and Within Margin Choose Fasteners That Stay Put Once installed, windows face constant stress from severe weather, temperature shifts, and building movement and settling. The wrong fasteners can loosen, back out, or corrode, compromising the building envelope. Cheap screws often lack the holding power or corrosion resistance needed for long-term performance. If the fastener fails, it can trigger costly callbacks and repairs. Premium screws are engineered to grip and hold. They’re made from stronger materials, feature thread designs that resist loosening over time, and are coated for long-term corrosion resistance in moisture-prone areas like around windows. That means less shifting, fewer leaks, and more peace of mind for you and the end user. Know The Code In some regions, building codes dictate the type, length, or corrosion-resistance level of fasteners used around windows, especially in high-wind or coastal zones. Failing an inspection over a low-quality screw is a preventable mistake. Even in areas with more relaxed codes, following best practices with fastener selection shows professionalism. All of these tips can boil down to one takeaway: fasteners matter. With the cost of windows and the need for a precise install, the cost of premium screws is a small price to pay. What is an extra $50 per job to protect a window that may cost up to $20,000? Don’t just pick up the least expensive package or fish around for what’s available in your toolbox to keep costs down. A premium screw can save thousands in jobsite delays, window replacements, and callbacks. -- About the author: Robert Yates is a SPAX Product Manager with extensive experience designing and testing fasteners for the construction, cabinetry, and trim markets. He leads with a focus on contractor user experience, turning field insights into high-efficiency solutions that reduce wasted effort, streamline workflows, and improve everyday performance.
- Spring Lawn Care Tips
(guest post courtesy Valerie Smith for Sod Solutions) With the first day of spring approaching, warmer weather signals plants to come out of dormancy and start flourishing again. Pretty soon, your lawn and garden will be full of color and activity! If you have a warm season lawn, your turfgrass will come out of dormancy and if you have a cool season lawn, snow in your area will start to melt and you’ll enjoy a greener environment. Click here to learn more about the differences between warm and cool season turfgrass. For detailed spring maintenance tips on specific grass types, visit the Sod Solution blogs on spring maintenance for your zoysia , St. Augustine , bermuda grass , centipede grass , bluegrass or fescue lawn . Spring Mowing The timing for the first mow of the spring for your mature, established turfgrass widely varies depending on the area you live in. Grasses come out of dormancy differently depending on the environment and temperatures your area encounters. For example, if you live in South Florida, your grass may have never entered dormancy at all during the winter. Many homeowners who live in South Florida will mow their lawn every other week during the winter—oftentimes starting in September and resuming a regular, weekly mowing schedule again in mid-March. Generally speaking, mid-March is about the time for you to begin your regimen for spring green-up and mowing. Mowing heights vary for each grass type, but for all of them, never remove more than a third of the leaf blade at any time . The first mow of the spring should not take place while warm season grass is dormant. Mowing heights differ per each grass type in the spring, however. Lastly, a good tip for spring is to make sure your lawn mower blades are sharpened so that the mower blades neatly slice through the grass in place of ripping them. If the grass blades aren’t cut neatly, the mower is ripping them and opens the grass up to possibility of disease. Performing regular maintenance on your mower is good practice for the end of the mowing season or before spring takes place. Pictured above: Adjustment of mower height settings. Spring Fertilization Spring is one of the most important times of the year to use a fertilizer. Warm season grasses are coming out of dormancy, so you will want to promote healthy roots and the return of green leaf blades. Be careful when making your first fertilizer application of the year though—a lot of homeowners see their grass green-up and immediately pull out the fertilizer and lawn mower. We advise that you typically wait until the last frost has hit. If you fertilize your lawn and another frost hits, your grass will go right back into dormancy and you’ll have a harder time getting it to green up again. This does more harm than good. The date of the last frost varies from location to location. In the Florida Panhandle, for example, grass doesn’t ever go truly dormant and reaches its full green-up in early February (depending on how cold the winter was). Even then, you won’t want to apply fertilizer until after Easter once the last frost has passed. Refer to the Farmer’s Almanac to figure out the last frost date for your area in 2021. Sod University recommends two different options for spring fertilization: Lawnifi Foundation , a slow-release granular option that comes in 25 lb. bags and lasts for three months, and Lawnifi Spring Fertilizer Box , a liquid fertilizer program that includes three bottles of liquid fertilizer that can be applied monthly with a hose-end sprayer. Each option covers 5,000 sq. ft. Learn more in Granular vs. Liquid Fertilizers . The patented nano-fertilizers with Catalyst Technology can give your lawn the jump-start it needs to emerge from dormancy, green up fast and thrive throughout the spring months. Next, it is important to mention that if you have a warm season lawn, you may start to notice spots of brown or straw-like grass while the rest of your lawn comes out of dormancy. This is usually a sign of disease. You do not want to apply fertilizer to a lawn with disease as the nitrogen in the fertilizer will feed the disease and promote its growth. Apply a systemic fungicide first and then wait several weeks before following with a fertilizer application. Spring Watering Dormant, warm season turfgrass doesn’t need much water until the active growing season kicks in and your grass starts to green up. In this Winter Lawn Maintenance Tips article, we explain that if you have a dormant, warm season lawn, it is not dead—it’s just “sleeping”. Although dormant grass requires much less water than it would while it is actively growing, it will still need water. Once your grass starts to green up from winter dormancy, however, you should resume watering your lawn with about one inch of water per week including rainfall. If you aren’t sure how to measure how much water your lawn is receiving, an irrigation audit may be beneficial to you. If you’re a homeowner who lives far enough south and your warm season grass doesn’t go dormant during the winter, you may continue to regularly water your lawn in the winter. However if you live in South Florida, for example, you may turn your irrigation off completely during the winter and during the months of June–August when it rains a lot. The atmosphere in South Florida isn’t usually evaporating much water and the grass isn’t using it much during the winter, so frequent irrigation isn’t needed. The next few tips in this article discuss spring applications for fungicides, herbicides or insecticides. If any of these control products or fertilizers are granular, you will need to water the product in so that your lawn absorbs it. This means that you will already be watering your lawn with the appropriate amount of water during the week of application. The same can be said with any liquid products as they are either products that attach to the end of your garden hose or require tank mixing with water. Spring Weed Control The most important thing you can do for any weed issues your lawn may be having come springtime is apply a pre-emergent herbicide. A pre-emergent herbicide functions to prevent weeds from emerging from the surface of the soil, as its name suggests. So if you know you get a lot of weeds in the summer like crabgrass , goosegrass or sandspurs, applying a pre-emergent to keep them from even appearing may be a good idea for you. It will also save you time, money spent on more product and effort from pulling the weeds that appear in the future. It’s actually not recommended you use an herbicide in the summer or winter, so pre-emergents can be especially useful for this reason. Read more about this in The Best and Worst Times for Herbicide Applications . Pre-emergents should be applied during the spring when ground temperatures reach about 55 degrees Fahrenheit. The exact dates for these applications differ depending on the area you live in, but generally speaking, pre-emergents should be applied between March 1st and March 15th in the spring. For more information, read this blog on spring pre-emergent applications . Apply post-emergent herbicides in May as needed to control summer annual and perennial broadleaf weeds like white clover , knotweed, spurge and lespedeza. Products containing multiple broadleaf active ingredients like SpeedZone Broadleaf Herbicide for Turf are more effective in controlling broadleaf weeds. Spring Insect Control If your lawn has suffered from insect damage around this time in the past, it is a good idea to apply a broad-spectrum insecticide at this time to prevent them from coming back again. If the insecticide is a granular product, be sure to water it in so that it soaks into your soil. If it is a liquid product, you will either need to attach it to the end of your garden hose or tank mix it. Some of the most common of insects in the springtime are white grub worms , chinch bugs and billbugs . You can read more about these insects in this Insect Identification blog. Pictured above from left to right: White grub worms, Southern chinch bugs, and a hunting billbug. Spring Fungus Control As previously mentioned, if you have a warm season lawn, circular brown or yellow spots may start to show up as it comes out of dormancy. This is a sign of disease and you may need to make applications of a systemic fungicide. Even if you don’t have disease in your lawn, it’s still good practice to apply it preventively to keep disease from taking over—especially if you’ve had disease in the past around this time. Systemic fungicide applications should take place before you apply any spring fertilizer. If you have fungus in your lawn, the nitrogen found in fertilizers oftentimes feeds it and helps it spread. Apply a systemic fungicide and wait a few weeks before applying any fertilizer. Pictured above: Spring dead spot. Lastly, if you notice thatch that is thicker than 1⁄2 inch, de-thatch in late May. For compact soils, consider aerating in late spring instead. Read more in Aerating vs. Dethatching . Spring maintenance tips somewhat differ from maintenance practices that take place during the rest of the year because the weather is starting to warm up and everything starts to turn green again. Although cool season grass doesn’t usually go dormant during the winters, snow in a lot of the areas up north starts to melt and your lawn will receive more sunlight. It is important to partake in spring maintenance so that you can set your lawn up for success for the rest of the year. Editor's Note: Sod Solutions has helped successfully develop and release to the market over 20 different turfgrass varieties over the past 27 years including PalmettoⓇ and CitraBlueⓇ St. Augustine, EMPIREⓇ and InnovationTM Zoysia and CelebrationⓇ, Latitude 36Ⓡ and NorthBridgeⓇ Bermudagrass. The company is based in the Charleston, SC area. For all media inquiries, contact the author Valerie Smith at valerie@sodsolutions.com . To visit the Sod Solutions website, click here .
- Wood Ceiling Installation Done Right - New Video!
Learn the steps to install a rustic-style cypress ceiling made of tongue-and-groove boards. We offer pro tips and tool suggestions, so you can complete the project with success! Special thanks to: Southern Cypress Manufacturers Association, www.cypressinfo.org Roy's Wood Products, www.royswoodproducts.com
- Under-Deck Drainage Installation
If you’re building or refreshing a second-story deck, one of the smartest upgrades you can add is an under-deck drainage system. Not only does it protect your deck from moisture damage, but it also lets you turn the space underneath into something usable – whether that’s extra storage, a cozy patio or a fully outfitted entertainment zone. With a drainage system in place, your deck becomes a multi-level extension of your home. A dry under-deck area isn’t just convenient, it also helps extend the life of your deck by keeping the frame protected from moisture that can lead to rot and decay. Once the space is waterproofed, you can safely add lighting, ceiling materials, fans and more without worrying about exposure to the elements. The systems shown in this article, the Trex RainEscape system is designed with DIY’ers in mind. Using a network of troughs and downspouts, the system moves water away from the deck framing and into your gutter system. The result: a dry, protected space beneath your deck and a stronger structure overall. This media room was built beneath a deck enclosed with the Trex RainEscape drainage system. Following is everything you need to know to install the system yourself: How The System Works Before getting started, it helps to understand what makes the Trex RainEscape system different. Many drainage systems install below the joists that support the deck’s surface. This leaves the joists vulnerable to water and other debris that falls through the deck boards. Trex RainEscape installs above the joists before any decking goes down. This approach offers two big advantages: better protection and a completely dry space. Water never touches the joists, helping prevent rot and long-term damage. Because moisture never gets below the deck surface, the area underneath can be finished like an outdoor room. The system itself is simple: downspouts catch water from each joist bay, troughs direct the water toward the gutter and butyl tape seals everything for a waterproof finish. Tools & Materials You’ll Need In addition to the system itself, you will need the following tools: Utility knife or scissors Staple gun with standard staples Caulk gun Nails or screws for keeping troughs aligned Step-By-Step Installation Step 1: Install the Downspouts Start by installing the downspouts, which move water from each joist bay into the gutter system. Cut along the pre-scored lines to match the joist spacing (usually 12” or 16" on center). Position each downspout along the rim joist or ledger board, cutting away the side facing the open bay. Ensure the downspout extends about one inch into the gutter — this guarantees a positive flow path for runoff. Pro Tip: Install the downspouts before any troughs or decking to maintain proper alignment and flow direction. The RainEscape material is available in two colors, black and brown. Apply butyl caulking beneath any ledger flashing to prevent water intrusion. Step 2: Install the Trough Material The troughs carry water from the joists down to the downspouts. Place the trough with the smooth, shiny side facing up. Lay the material across the joists, keeping it smooth and free of wrinkles. Each bay gets one continuous piece – don’t overlap the troughs.Staple the material into the joists, rim joists or headers (never into the decking surface or non-structural areas). Make sure the trough slopes gently toward the gutter end about 1/4” per foot, which is enough to help water drain. Step 3: Repeat Across All Joist Bays Continue the process bay by bay. Work methodically to maintain alignment, especially on wider decks where visual continuity matters. A good practice is to install a mid-span nail underneath each joist to help hold the trough straight and taut during installation. This keeps the channel open, prevents sagging and helps avoid pooling water. Step 4: Seal with Butyl Tape Once the troughs and downspouts are in place, seal everything with butyl tape to ensure the system is fully waterproofed. This includes all seams, all staple holes, and any nail or screw penetrations. Make sure surfaces are clean and dry so the tape sticks well. Pro Tip: Press the tape firmly to remove air bubbles and ensure a tight, waterproof bond. Step 5: Test the System Before installing deck boards, test your setup. Confirm that each trough has a consistent slope. Pour a little water into a few bays to ensure proper flow and smooth drainage. Make any needed adjustments before the decking goes down. Step 6: Install Decking When it’s time to install your deck boards, avoid using any fasteners that could puncture the drainage membrane. Use flat-based clips or screws, and do not use nails. Pro Tip : Don’t over-drive the screws, because over-tightening can damage both the fastener and the waterproof layer below. Step 7: Finish the Under-Deck Space Once your drainage system and decking are installed, the space below is ready for whatever you want to create. Popular DIY options include a finished ceiling, r ecessed soffit lighting , ceiling fans, weather-protected storage, a TV or entertainment setup, or even a covered patio or lounge. Dos And Don’ts for Success Do : Keep the joists straight, clean and aligned. Ensure every bay drains into a gutter outlet every 12–14 feet. Tape all seams, fastener holes and overlaps. Don’t : Staple through non-structural members. Allow debris or water to remain under the tape. Use nails or spiked fasteners. Forget to verify the slope and water flow before installing decking. Small details make a big difference in long-term performance. A Smart Investment Installing an under-deck drainage system may add an extra step to your deck-building project, but the benefits are well worth it: You protect your deck’s frame from moisture and rot. You gain valuable, usable space beneath your deck. You unlock the ability to finish the area with lights, ceiling fans and more. And, you increase your home’s overall value and versatility. With the RainEscape system, you’re not just building a deck, you’re creating a year-round outdoor space your whole household can enjoy. -- For more, visit TrexRainEscape.com .
- Home Appliance Shopping Tips: Best Times to Save Money
Is someone in your home in the throes of a shopping frenzy? Are boxes piling up throughout your house? Is your credit card smoldering from overuse? You're not alone. The holidays bring the hottest days in retail sales every year, so you might as well develop a plan to spend as wisely as possible when shelling out all that money. New analysis reveals the best days and times to shop for home appliances this December to get the lowest prices. Data-collection provider Decodo analyzed over 785,000 prices from 37 major U.S. retailers throughout 2025 with a focus on home appliances. The study highlights how prices fluctuate throughout the week and day, helping shoppers find the best deals this holiday season. Best Times to Buy Home Appliances Online in December Best time to shop: Wednesday at 4:00 PM, when prices drop by 22.16% on average Worst time to shop: Thursday at 9:00 PM, when prices increase by 33.63% on average Dynamic pricing means prices can fluctuate based on demand, time of day, inventory, and store restocking schedules. That’s why an item priced at $499 may drop to $459 if you shop at the optimal window. Best Week Times to Shop Home Appliances Day Time Median Price Savings vs Baseline Status Wednesday 4:00 PM $349.50 -22.16% Best time Sunday 12:00 AM $349.99 -22.05% Midnight deal Sunday 8:00 PM $349.99 -22.05% Evening Monday 12:00 AM $349.99 -22.05% Start of week Tuesday 4:00 PM $349.99 -22.05% Afternoon Tuesday 8:00 PM $349.99 -22.05% Evening Wednesday 12:00 AM $349.99 -22.05% Midnight Wednesday 4:00 AM $349.99 -22.05% Early morning Wednesday 8:00 PM $349.99 -22.05% Evening Thursday 12:00 AM $349.99 -22.05% Midnight The results show that early Wednesday afternoons (4:00 PM) consistently offer the deepest discounts, making it the best time for holiday appliance shopping. Other notable savings can be found during the week, highlighting that appliances are regularly discounted. Worst Week Time to Shop Home Appliances Day Time Median Price Savings vs Baseline Status Thursday 9:00 AM $599.99 33.63% Worst time Sunday 2:00 AM $499.00 11.14% Early morning Sunday 6:00 AM $499.00 11.14% Morning Sunday 10:00 AM $499.00 11.14% Late morning Monday 6:00 AM $499.00 11.14% Morning Thursday early mornings (9:00 PM) are the worst time to purchase home appliances, with price increases of 33.63% on average. Home Appliance Prices Throughout 2025 Month Median Price MoM Change Discount from Jan Status January 349.99 0.00 0.00 Post-holiday clearance February 429.99 +22.86 +22.86 Sharp post-sale rise March 369.99 -13.95 +5.71 Spring clearance April 449.99 +21.62 +28.57 Post-clearance jump May 479.99 +6.67 +37.14 Rising June 499.99 +4.17 +42.86 Summer premium July 519.99 +4.00 +48.57 Mid-summer high August 539.99 +3.85 +54.29 Peak summer September 389.99 -27.78 +11.43 Fall clearance October 549.99 +41.03 +57.14 Pre-holiday spike November 379.99 -30.91 +8.57 Black Friday December 449.99 +18.42 +28.57 Holiday recovery Methodology Over 785,000 price checks and observations were collected from 37 major U.S. eCommerce retailers throughout 2025. Prices were tracked across categories including computing, mobile & tablets, TVs, and audio, cosmetics, clothing, and groceries. Dynamic pricing trends were analyzed to determine optimal shopping windows for maximum savings. Understanding Median Prices Decodo reports median prices, which represent the middle value when all prices are arranged from lowest to highest. For example: $200 $350 $400 ← Median $450 $1,200 The median is $400 because half the products cost less and half cost more. Unlike the average, which can be skewed by extremely high or low prices, the median provides a better reflection of what a typical shopper actually pays.