
Install a Wood Ceiling
- Matt Weber

- Feb 16
- 6 min read

By Matt Weber
Installing tongue-and-groove wood boards onto a ceiling is a popular project that provides a room warmth, character and a classic look.
When updating the look of a little girl’s bedroom, we wanted a more stylish look for the ceiling than the “sea of cottage cheese” appearance of acoustical texture, which was popular among homebuilders for hiding drywall flaws and providing sound dampening. We considered scraping, refinishing and painting the ceiling, but that’s a messy chore and in the end, although we will have removed the texture, we will not have added much character.
Since rustic wood was a recurring design theme throughout the home, we selected tongue-and-groove (T&G) cypress boards to cover the ceiling texture and continue the theme.
The Basics
The instructions covered in this article generally apply to a standard interior installation (e.g., cypress, pine, cedar, or similar softwood boards, often 1x4 or 1x6). Always check local building codes for any restrictions in your area.
When ordering the T&G boards, calculate the square footage of the room and add 10 to 15 percent extra for cuts, waste and defects.
For trim and molding around the perimeter edges, we selected 1x4 boards to match the ceiling, but the trim boards are square on all sides.
The tools required include a stud finder, chalk line, measuring tape, 4-foot level, miter saw or circular saw, nail gun and ladder. I will point out a few other recommended items throughout the article.
If your boards arrive unfinished, then you’ll also need paint and related equipment.
For this project we chose Southern Cypress, known for its durability, versatility and its
beautiful woodgrain character, which is why we selected it for this rustic style ceiling. To
preserve its natural character, we applied a thin coat of whitewash paint, which still allowed the grain to show through the finish.

Important T&G tip: If you are installing boards with a decorative gap along the joint, then it is critical to recognize that the gap only exists on one side of the board, not the other. This means the boards are not symmetrical, so it's very important to keep that in mind and orient the boards correctly when you're painting and installing them.


Plan and Prepare
The basic preparation steps of wood-flooring installation also apply to this project.
First, acclimate the boards in the room for 3–5 days so they adjust to temperature and humidity, because wood expands and contracts with changes.
T&G boards require a very flat and level installation for the tongues to fit into the grooves along the joint. When a board bends against an uneven substrate, the joints will not align which makes it difficult to connect the boards.
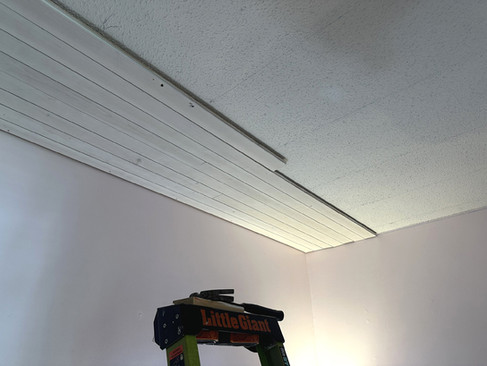
Even if the boards you're installing do not have tongue and groove joints (such as shiplap, etc.), it's still a good idea to check the flatness of your ceiling, because if you nail boards directly to an uneven ceiling, then you will have uneven gaps along the edges that become noticeable when you install trim around the perimeter.
To make sure the ceiling is flat, snap level chalk lines along the walls just below the ceiling. Measure the distance between the chalk line and ceiling to ensure its flatness. In some cases, you can mark uneven areas of the ceiling where shims can be installed behind the boards to compensate for dips. Any projections should be sanded flat.


If the ceiling is uneven, you can first install 1x2 or 1x3 furring strips perpendicular to the planned board direction, spacing them 16 to 24 inches apart, and fastening them securely into the joists.
The strongest and most common way to install the T&G boards is to orient them perpendicular to the ceiling joists. However, installing furring strips perpendicular to the joists can provide a nailing surface if you want to run the T&G boards parallel to the joists.
First step is to find the joists with a stud finder and mark them with chalk lines.


The rustic character of rich Southern Cypress enhances the style of a bedroom remodel.
Installation Procedure
The installation of the T&G boards requires a 1/4- to 1/2-inch expansion gap around the entire perimeter (walls) to prevent buckling from seasonal movement.
Measure the room dimensions. Divide the width of the room by the exposed width of the T&G boards. If you have a small remainder to indicate a noticeably thin board along the last row of the ceiling., then you can rip the first row thinner on a table saw to allow more room for the final row.
I recommend cutting off the groove joint of the first row of boards so you can align the square edge along the wall and fasten it to the ceiling securely through solid wood. The tongue should be facing outward. When positioning the first board, remember to insert temporary spacers between the board and the wall.
Measure the distance from the first board to the end of the first row, then cut and install a board to fit.
Begin the second row of boards with the cutoff remainder of the first row. Then measure to the end of row two. Cut and install a board to fit.


Proceed with this pattern from row to row. Avoid aligning the end seams in a straight line between rows. Stagger the end joints by at least 12 to 24 inches for a random, natural look.
Some installers prefer to begin installation in the center of the room and work outward. However, if a fixture in the room’s center requires installation of two boards instead of one, then it is critical to install the two center boards in perfect alignment with each other, or you will have alignment issues with the boards that follow.
Joining and Fastening
To help disguise the end joints between the boards, I recommend cutting the ends at 45-degree bevels and applying matching paint to the exposed wood.


For the first and last rows, I fastened the boards with trim-head screws which would ultimately be concealed by the perimeter trim boards.


I fastened the majority of the boards by blind-nailing them with a 15-gauge finish nailer and 2-1/2-inch nails. “Blind-nailing” is a technique to drive the nail at a 45-degree angle through the tongue of the joint and into the ceiling joist. Installation of the following row will conceal the fasteners from view. Blind-nail the T&G boards into the ceiling framing where they cross each joist.
The rows interlock along the edges with T&G connections, which can be joined tightly with encouragement from a tapping block and a hammer.


For the last rows, switch back to screws when you run out of room for the nail gun. The final row is screwed through the face along the edge, and the screws are then concealed by the trim.
The trim boards along the ceiling edges were square on all sides. Since they would be so prominent, I was careful to select boards with the most interesting grain patterns. The trim is fastened to the wall studs with finish nails, and I filled the fastener holes with spackling.

Final Tool Tips
If you need to rip your first and last row to thinner widths, then using a table saw with
a rip fence is the easiest way to accomplish this task.
Once installation of the boards reached the ceiling fan location, I realized that my can of spackling matched the size of the electrical box, so I used it as a template to trace the shape on the boards and make the cutout using a jigsaw. The T&G boards left the fan box too recessed into the ceiling, so I screwed an extension ring onto the box.

You might find a pry bar useful for applying pressure to close the end joints between the boards. If you do so, be sure only to leverage the pry bar against the top plate of the wall and not against unsupported drywall (or you can damage the wall).


Other useful tools include a ladder with holder slots to keep tools close by. One such tool is a putty knife, which can serve as a prying device to slip behind bowed boards to adjust their joint alignment.

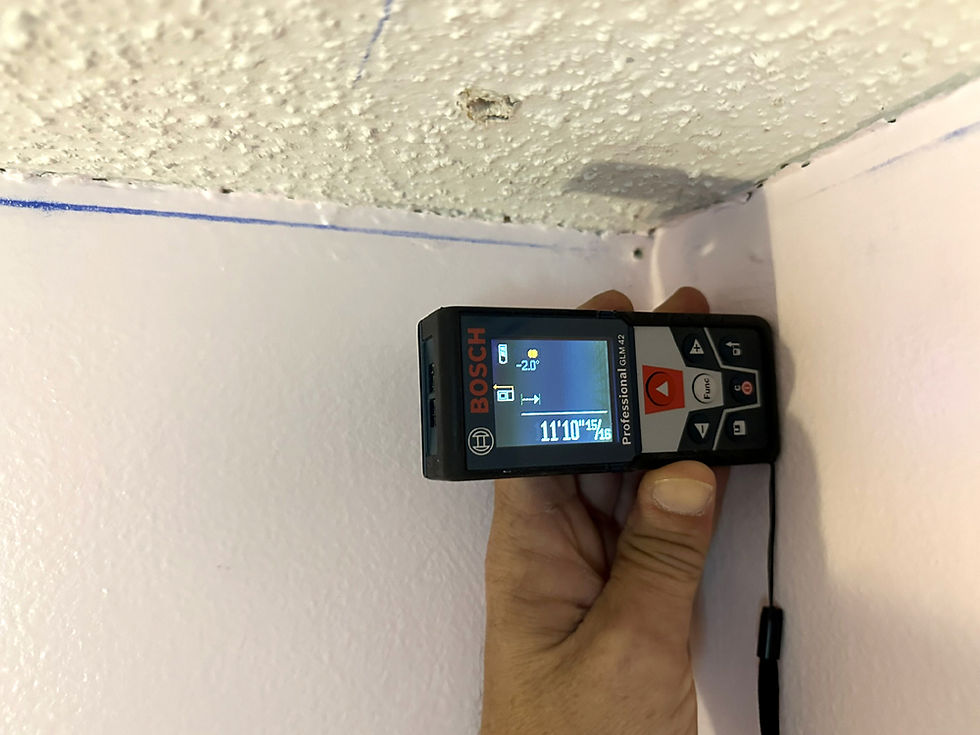
A laser distance meter can take quick board-length measurements at the press
of a button and with greater accuracy than a tape measure. This is a highly recommended tool for pros or serious DIY’ers.
Recruiting an assistant will be a big help on this project, but for those of us working alone, a cabinet jack can help to position the boards against the ceiling.

Trim installation is fairly straightforward, but it’s common to find a buildup of drywall compound in the wall corners. It might be helpful to remove wood material in a beveling method from the back of the trim with a power sander to ensure a better fit inside such corners.

Once the project was complete, the new rustic Cypress ceiling looked much more stylish than the old, outdated popcorn texture. Next step is to repaint the room and add matching trim around the windows and the doors.
--
Special Thanks: I would like to thank Roy's Wood Products for supplying the beautiful Cypress lumber, and thanks to Southern Cypress Manufacturers Association for supporting this project. For more, visit www.cypressinfo.org and www.royswoodproducts.com.


Comments